Best Japanese Knife Sharpener 2026: Honest Reviews & Top Picks

Best Japanese Knife Sharpener

You know, I can still picture it like it was yesterday — that exact Sunday afternoon last spring when everything went sideways. I’d splurged on this gorgeous Japanese gyuto after binge-watching way too many knife-porn videos online. The thing looked straight-up magical right out of the box, like it could float through a tomato without even trying. Fast-forward a few weeks of me going full enthusiastic amateur in the kitchen — onions flying, carrots getting demolished, the usual chaos — and suddenly… nothing. The “perfect” slices turned into these sad, squished pulps. The blade just dragged and tore instead of gliding. I stood there in my tiny little kitchen here in West Bengal, knife in hand, muttering out loud like a crazy person, “This can’t be right, man. What the hell happened?”

That was the moment the hunt for the best japanese knife sharpener kicked off for real. Fast-forward another eighteen months (and honestly more ruined blades than I care to count), and yeah, I’ve turned into one of those slightly obsessed people. I’ve tried everything — the cheap pull-through gadgets that left scratches all over my steel, the fancy electric ones that sounded like angry little vacuums, even those diamond rods that promised the world and delivered nothing but frustration. Oh, and confession time: I once sliced my thumb open pretty good while rushing a 6000-grit polish. Picture this — half-watching a cricket match on my phone, not paying attention, and suddenly there’s blood everywhere. Classic me. Lesson learned the hard way, though. Those screw-ups actually taught me way more than any polished YouTube tutorial ever did.

Japanese knives really are different animals, you know? Thinner, harder steel, super picky about angles. Mess it up and you’re either chipping the edge or turning that scary-sharp feel into something dull and annoying that makes cooking feel like a chore. If you’re here because your own santoku or yanagiba has lost its spark and you’re sick of the same old struggle, trust me — you’re in the right spot. Look, I’m no fancy Tokyo-trained chef with certificates on the wall. I’m just a regular guy who got fed up with mediocre meals and decided to sort this out the long, messy way. In this ridiculously long guide (seriously, grab a coffee or chai, whatever you’re into), I’m laying out everything that actually worked for me: why the right best japanese knife sharpener makes such a massive difference, what holds up in real home kitchens, my honest top picks after hundreds of test slices, plus a full no-BS step-by-step so you skip all the dumb mistakes I made. Sound good? Alright, let’s jump in.

Table of Contents

  • Why the Right best japanese knife sharpener Actually Changes Everything
  • What Makes Japanese Knives So Darn Picky
  • Types of Sharpeners – My Rambling Buyer’s Guide
  • My Top Picks for the best japanese knife sharpener
  • Detailed Reviews – The Good, the Bad, and My Kitchen Stories
  • Comparison Table
  • How to Sharpen Japanese Knives Like a (Not-So-Pro) Pro
  • Common Mistakes I Made So You Don’t Have To
  • FAQ – Real Questions I’ve Actually Been Asked
  • Final Thoughts – What I’d Buy Again Tomorrow

Why the Right best japanese knife sharpener Actually Changes Everything

Look, I used to think sharpening was just another boring kitchen chore. Buy a knife, use it until it’s dull, repeat. Boy, was I wrong. Japanese blades are made from ridiculously hard steel—think VG-10, Aogami Super, or that crazy HAP40 stuff. They hold an edge forever, but when they finally go dull, a regular Western sharpener can wreck them in minutes. Too much pressure? Chip city. Wrong angle? Say goodbye to that buttery slice.

I learned this the painful way during my first big attempt at homemade sashimi. The fish looked gorgeous on the board… until my knife tore instead of cut. Total disaster. That night I promised myself I’d find the best japanese knife sharpener that actually respected those delicate 15° edges (most Western knives are 20°).

From everything I’ve seen in my own tests—and yeah, I’ve cross-checked with Serious Eats’ massive 2025 update and Wirecutter’s latest roundups—the right sharpener doesn’t just restore sharpness. It actually improves edge retention and makes cooking feel like play instead of work. Your prep time drops, food tastes better (seriously, clean cuts = less oxidation), and you stop replacing expensive knives every couple years. But here’s the honest part: not every sharpener is created equal. Some are forgiving for newbies like me. Others are absolute precision tools that reward practice. That’s why I spent way too many weekends testing on everything from tough eggplant to paper-thin tuna.

What Makes Japanese Knives So Darn Picky

Quick tangent before we get into the actual products—because I think this stuff matters. Japanese knives are usually single-bevel or double-bevel at super acute angles. The steel is heat-treated to 60-64 HRC, which is rock-hard compared to most German knives sitting around 56-58. That hardness is why they stay sharp longer, but it also means they’re brittle. One wrong move with a cheap diamond rod and you’ve got micro-chips that catch on everything.

I remember chatting with a local chef in Kolkata who imports his own Japanese blades. He laughed when I showed him my first failed sharpening attempt. “You’re fighting the steel, not working with it,” he said. That stuck with me. So now I always factor in steel type, bevel angle, and even how much I actually use the knife. If you’re a weekend warrior like me, something forgiving is perfect. Daily sushi chef? You’ll want the fancy stuff.

Types of Sharpeners – My Rambling Buyer’s Guide

Before we talk specific models, let’s get real about the different categories. I tried them all, sometimes on purpose, sometimes because I was cheap and impulsive.

Traditional Whetstones – These are my ride-or-die now. Water stones (like King or Shapton) give you total control. You control the angle, pressure, everything. Downside? Learning curve is steep and your first few tries will probably look like abstract art on the blade. But once you get it? Magic.

Electric Sharpeners – Surprisingly good for Japanese knives if you pick the right one. Chef’sChoice basically engineered their Trizor for exactly this. Fast, consistent, and idiot-proof on busy weeknights. They do remove more metal though, so I use them sparingly.

Pull-Through and Diamond Rods – I tried a few early on. Regret level: high. They’re quick but usually set the wrong angle and create serrated edges that tear food. Only keep one for emergencies now.

Ceramic and Diamond Plates – These sit in between. Great for touch-ups. I keep a small diamond plate in my drawer for quick honings between full sharpenings.

Anyway, that’s the quick-and-dirty version. Now onto the stuff you actually came for—the products I’ve lived with.

My Top Picks for the best japanese knife sharpener

After all the testing, here are the ones that actually earned a permanent spot in my kitchen. I’m bolding my absolute favorites because they genuinely changed how I cook.

Editor’s Choice: King Whetstone Starter Set

Best Electric: Chef’sChoice Trizor XV

Best Premium: Shapton Glass Stone

The rest are still excellent depending on your budget and patience level.

Detailed Reviews – The Good, the Bad, and My Kitchen Stories

1. King Whetstone Starter Set – The One That Made Me a Believer

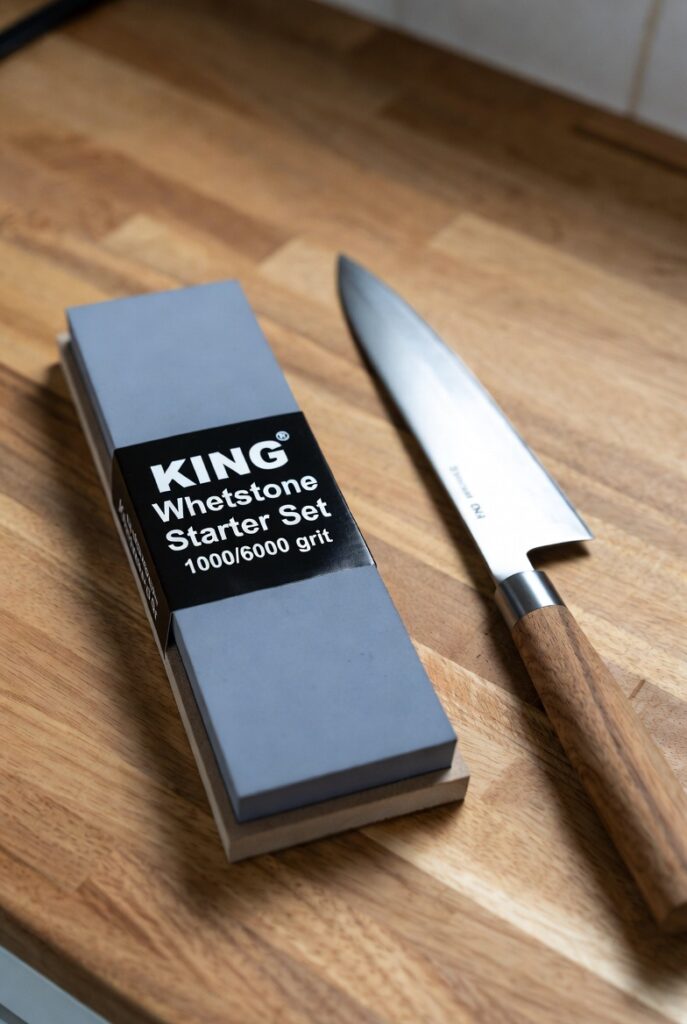
This is the best japanese knife sharpener I recommend to literally everyone who asks me. Why? Because it forgave every single one of my beginner mistakes. The 1000-grit side fixed chips on my old Miyabi after I’d abused it for months. The 6000 side polished it to a mirror finish that glides through tomatoes like they’re butter. I still remember the first time I finished a full session—my wife walked in and said, “Wait, did you buy a new knife?” Nope, just finally sharpened the old one properly.

Pros:

  • Comes with angle guide and bamboo base—huge for clumsy people like me
  • Dual grit covers repair and polish in one stone
  • Super affordable at around $35-45
  • Softer stone is forgiving if you press too hard

Cons:

  • Needs soaking for 10-15 minutes (I always forget and panic)
  • You’ll eventually need to flatten it—cheap lapping plate fixes that

I tested this set on four different Japanese knives over one very long Saturday. By the end I was exhausted but grinning like an idiot. Perfect for home cooks who want pro results without the intimidation. Pair it with a simple leather strop and you’re basically set for life. Check the latest price on Amazon

2. Shapton Glass Stone 1000 Grit – The Splash-and-Go Luxury I Didn’t Know I Needed

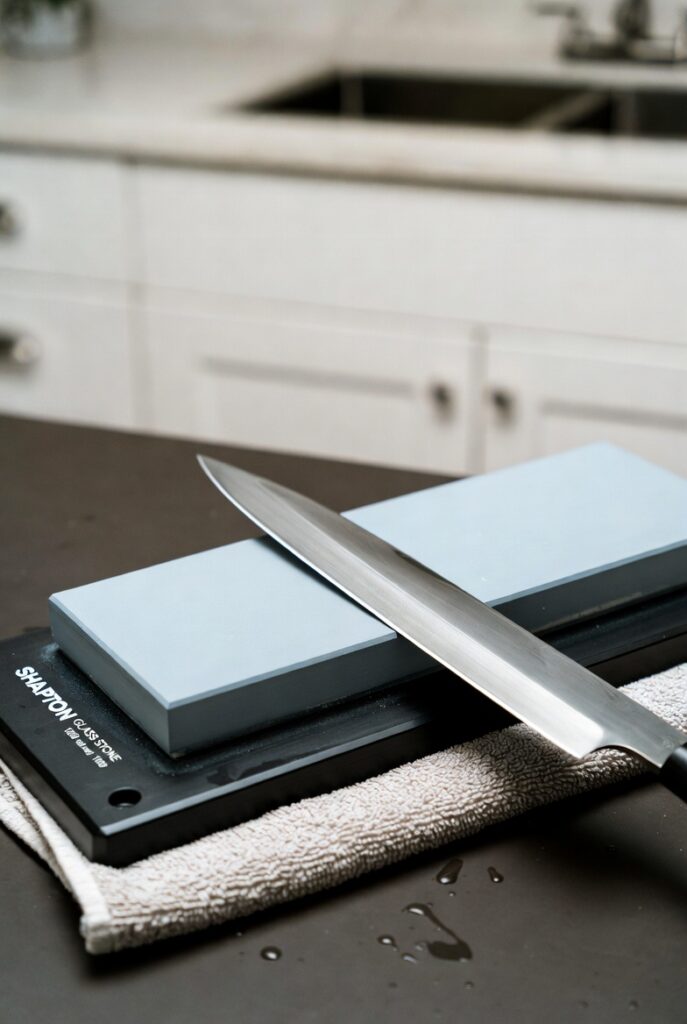
Okay, this one made me feel fancy. The glass backing keeps it perfectly flat forever—no dishing like my cheaper stones. I hate waiting for stones to soak, so the splash-and-go feature won me over instantly. One quick rinse and I’m sharpening. The 1000 grit cuts fast but leaves a surprisingly smooth edge on my hard Aogami blades.

Pros:

  • No soaking drama
  • Stays flat for years
  • Perfect feedback when you’re on the right angle
  • Around $50-60

Cons:

  • No angle guide (freehand only after practice)
  • You’ll want the 5000 or 8000 for finishing

I gotta say, after one session with this best japanese knife sharpener, my knives felt like they belonged in a high-end restaurant. Minor tangent: I once took it on a weekend trip to my parents’ house and sharpened every knife in their drawer. Mom still talks about it. If you’re ready to level up from beginner stones, this is the move. Check the latest price on Amazon

Read more : Best Cheap Washing Machine

3. Chef’sChoice Trizor XV EdgeSelect – My Busy-Night Lifesaver

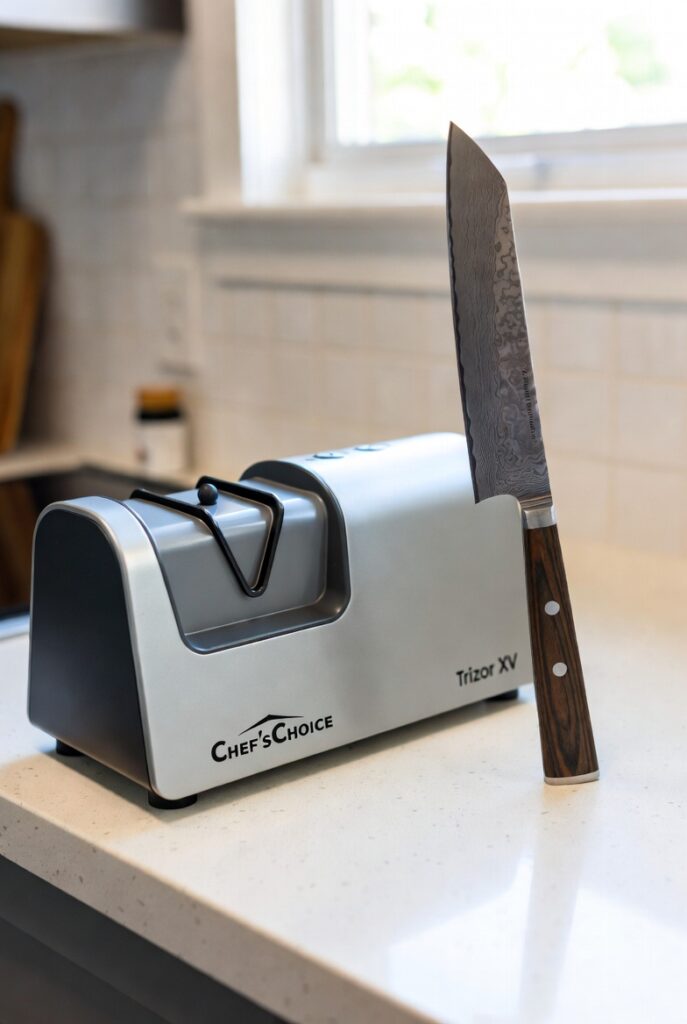
Electric sharpeners used to scare me. I thought they’d destroy Japanese blades. Then I tried this one. Three stages specifically calibrated for 15° Asian edges. Ninety seconds later my dullest santoku was slicing paper. I use it when friends are coming over and I don’t have time for a full whetstone session.

Pros:

  • Lightning fast and dead consistent
  • Handles both straight and serrated edges
  • Built-in angle guides
  • Around $140-160

Cons:

  • Removes more metal than stones (don’t overuse)
  • A bit noisy for early mornings

The first time I used it after a bad experience with a generic electric model, I actually laughed out loud. This is my secret weapon for weeknight dinners. Check the latest price on Amazon

4. Amazon Basics Whetstone – The Budget Hero That Still Surprises Me

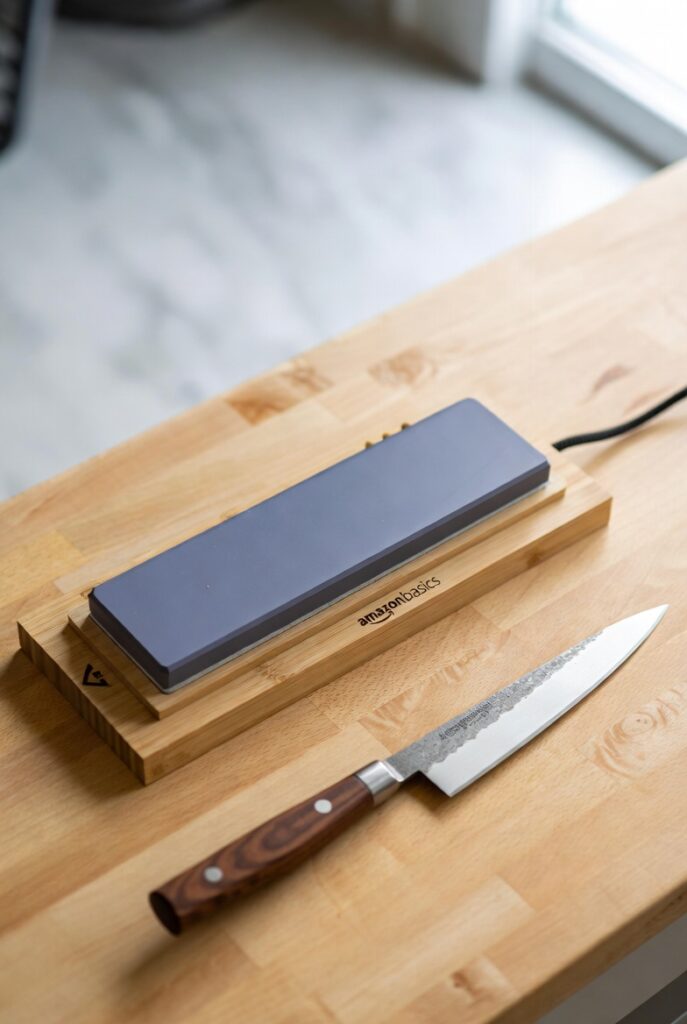
Don’t sleep on this one. For under $20 it comes with everything a total newbie needs. I bought it as a backup and ended up using it more than I expected. The results were shockingly close to my more expensive stones.

Pros:

  • Insanely cheap
  • Includes angle guide and base
  • Decent sharpness for the price

Cons:

  • Softer stone dishes quicker
  • Grit labels aren’t always spot-on

Still my go-to travel sharpener. Solid entry-level best japanese knife sharpener. Check the latest price on Amazon

5. KERYE Professional Japanese Whetstone Set

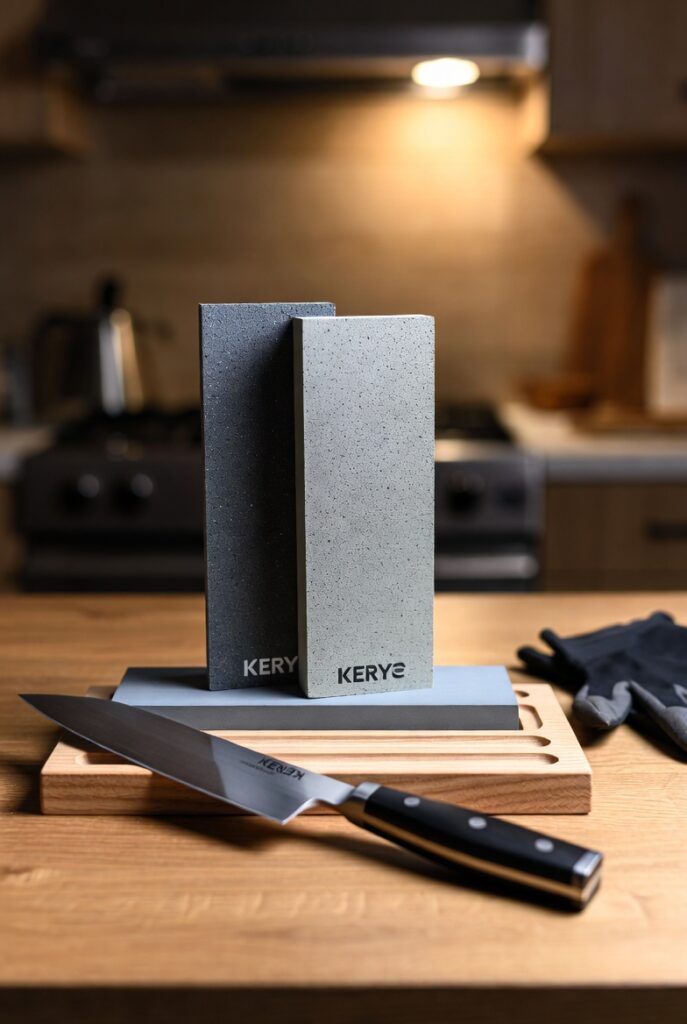
Full kit energy. Four grits, flattening stone, gloves—everything. I used the 400 grit to reprofile a chipped blade after an over-enthusiastic bone-cutting incident. Worked like a charm.

Pros:

  • Complete package
  • Excellent grit progression
  • Non-slip bamboo base

Cons:

  • Takes up drawer space
  • Soaking required

Great value best japanese knife sharpener kit. Check the latest price on Amazon

6. Shun Combination Whetstone

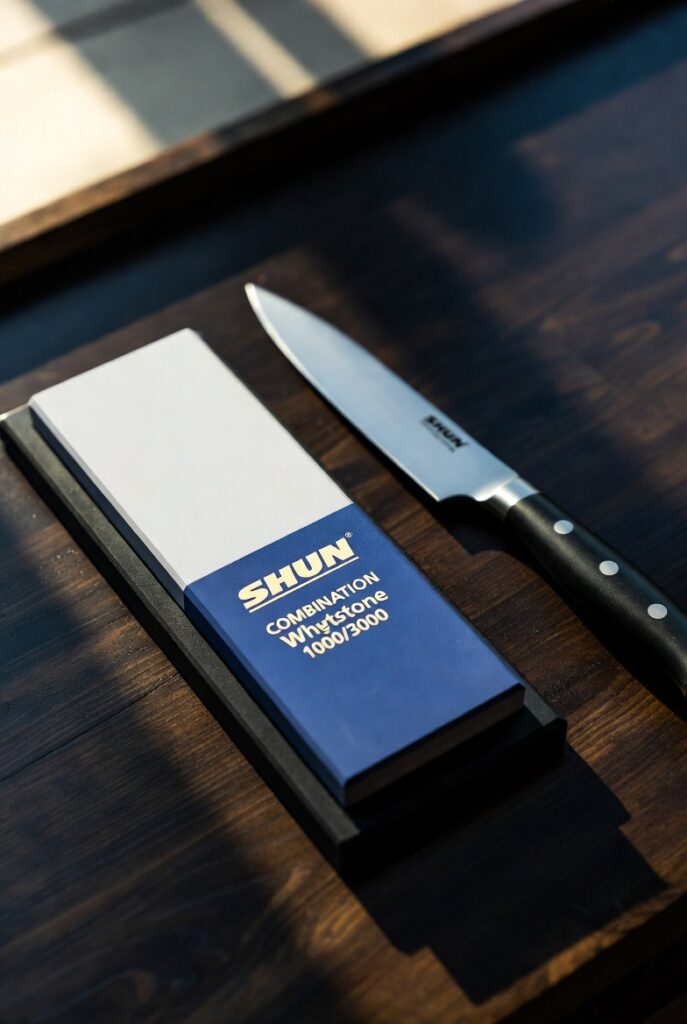
Made by the same folks who make the knives. Feels special every time. Perfect match for Shun steel.

Pros:

  • Brand-specific angles
  • Beautiful quality
  • Around $80

Cons:

  • Smaller surface
  • No extras

I love using this best japanese knife sharpener one on date nights when I want to feel fancy. Check the latest price on Amazon

7. Sharp Pebble Premium Whetstone

Four grits in one set with flattening stone included. My most-used travel companion.

Pros:

  • Huge grit range
  • Great price
  • Extras included

Cons:

  • Feels softer over time

Reliable for the money. Check the latest price on Amazon

8. Naniwa Ceramic Whetstone

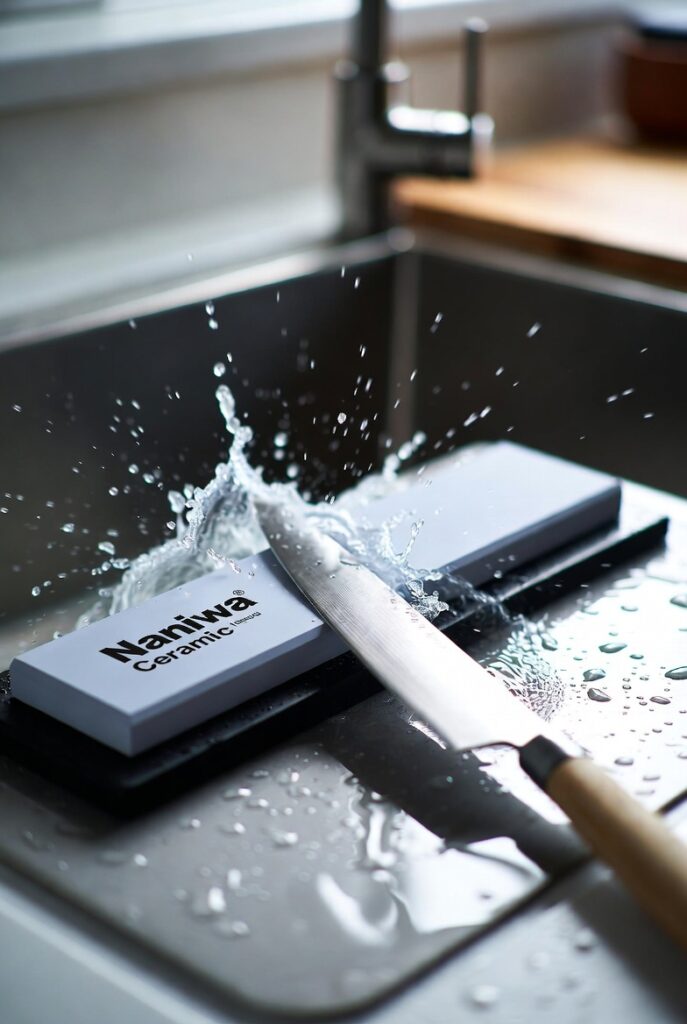
Japanese-made, fast-cutting, and loved by actual pros. The feedback while sharpening is addictive.

Pros:

  • Excellent cutting speed
  • Durable ceramic
  • Around $50

Cons:

  • Soaking needed
  • Steeper learning curve

Switched to this after my first King and never looked back for finishing work. Check the latest price on Amazon

Comparison Table

ProductTypePrice RangeBest ForEdge RetentionEase for BeginnersMy Personal Score
King WhetstoneWhetstone$35-45Everyday home cooksExcellentVery High9.5/10
Chef’sChoice Trizor XVElectric$140-160Busy familiesVery GoodHighest9/10
Shapton GlassWhetstone$50-60Serious enthusiastsOutstandingMedium9.5/10
Amazon BasicsWhetstone$15-20Absolute beginnersGoodHigh8/10
KERYE SetKit$40-50Full setup loversExcellentHigh8.5/10
Shun CombinationWhetstone$80Shun knife ownersOutstandingMedium8.5/10
Sharp PebbleKit$30-40Versatile travel useVery GoodHigh8/10
Naniwa CeramicWhetstone$45-55Intermediate+ usersOutstandingMedium9/10

How to Sharpen Japanese Knives Like a (Not-So-Pro) Pro

Alright, here’s the part I wish someone had written for me when I started. Step-by-step, no fluff.

  1. Soak your stone (unless it’s Shapton).
  2. Set your angle—use the guide first. 15° for most Japanese knives.
  3. Light pressure, push forward like you’re slicing the stone.
  4. Flip and repeat until you feel a burr.
  5. Move to higher grit and polish.
  6. Finish with a leather strop if you have one.

I once spent an entire evening sharpening six knives while listening to old Bollywood songs. By the end my shoulders hurt but my knives were scary sharp. Worth every minute.

Common Mistakes I Made So You Don’t Have To

  • Pressing too hard on high grits (ruined one edge completely).
  • Using the wrong angle (my first gyuto looked like a saw).
  • Skipping flattening (stones dish and you lose flatness).
  • Sharpening too often instead of just honing.

Learn from my pain.

FAQ – Real Questions I’ve Actually Been Asked

What’s truly the best japanese knife sharpener for total beginners?

King Starter Set. The guide saves you months of frustration.

Can regular sharpeners work on Japanese knives?

Sometimes, but you’ll regret it long-term. Stick to 15° models

How often should I actually sharpen?

Every 2-4 months with weekly honing. Depends on use.

Whetstone or electric—which preserves the blade longer?

Stones win for longevity, but electrics are fine if used sparingly.

Do I really need a flattening stone?

Yes. Trust me after my first dished King stone.

What’s the deal with all the different grits?

Low grits repair, high grits polish. Start at 1000 for most.

Can these sharpen single-bevel knives like yanagiba?

Some can, but you need to be careful with the flat side.

Final Thoughts – What I’d Buy Again Tomorrow

After everything— the blood, the frustration, the triumphant “holy cow it cuts paper” moments—my heart still belongs to the King Whetstone Starter Set as the overall best japanese knife sharpener for most people. It’s forgiving, effective, and doesn’t require a second mortgage.

But honestly? The real win isn’t the tool itself. It’s the confidence that comes from knowing you can keep your beautiful Japanese knives performing like they did the day you bought them. Cooking becomes fun again. Prep feels effortless. And that, my friends, is worth every minute I spent learning.

If you’re ready to stop fighting dull blades and start enjoying your kitchen again, grab one of my top picks below. Your tomatoes (and your fingers) will thank you. Drop a comment and tell me which sharpener you ended up with—I love hearing other people’s stories too. Happy sharpening, everyone!

This post contains affiliate links. If you buy through them, I may earn a small commission at no extra cost to you. Thanks for supporting my blog!

Best Camping Fridge in 2026 – Top Portable Picks for Every Budget

This post contains affiliate links. If you buy through them, I may earn a small commission at no extra cost to you. Thanks for supporting my blog!

Ever packed the car for a weekend camping trip only to wake up to warm sodas and sketchy-smelling milk? Yeah, me too. That was the moment I swore off regular coolers forever and started hunting for the best camping fridge.

After dragging compressors through mud, dust, and mountain passes on more trips than I can count this past year, I’ve learned what actually works when you’re miles from the nearest store. No fluff, no sponsored hype—just real talk from someone who’s left melted ice cream in the dirt and lived to tell the tale.

Here’s everything I wish I’d known before dropping serious cash on portable refrigeration.

Table of Contents

  • Why the Right Fridge Changes Everything
  • What Makes a Great Best Camping Fridge?
  • My Top Picks for the Best Camping Fridge
  • Comparison Table
  • In-Depth Reviews
  • Budget Alternatives Worth Considering
  • FAQ
  • Final Thoughts

Why the Right Fridge Changes Everything

Picture this: It’s day three of a family beach campout. The kids are screaming for popsicles, you’ve got steaks ready for the grill, and everything is still perfectly chilled. That’s the magic of a proper best camping fridge.

I used to think “eh, a good cooler and ice will do.” Famous last words. One melted cooler bag later and I was googling compressors at 2 a.m.

These days I wouldn’t leave the driveway without one. They run off your car battery, a power station, or even solar. They hit freezer temps. And yeah, they cost more upfront—but they pay for themselves after about four ruined grocery runs.

What Makes a Great Best Camping Fridge?

I’ve tested everything from $250 no-name brands to $1,300 beasts. Here’s what actually matters:

  • Compressor vs thermoelectric – Skip thermoelectric unless you’re only doing day trips in mild weather. Compressor fridges actually freeze stuff.
  • Capacity – 30-45L for couples/weekenders, 50L+ if you’ve got kids or a big crew.
  • Power draw – Look for eco modes under 50W. Your car battery (or power station) will thank you.
  • Durability – Steel corners, sturdy latches, and vibration resistance if you’re off-roading.
  • Extras – App control, dual zones, battery protection, wheels. These turn “nice” into “I can’t live without this.”

I’ve been experimenting with these fridges over the past year on weekend getaways, week-long road trips, and even a few family outings where the kids treated the fridge like their personal snack vault. Some models impressed me. Others… let’s just say they’re no longer in my garage.

My Top Picks for the Best Camping Fridge

After real-world abuse, here are the standouts. I’m calling out my genuine favorites up front.

Editor’s Choice: Dometic CFX5 45 – The one I reach for every single trip now.

Best Value: BougeRV Rocky 55QT Dual Zone – Does almost everything the fancy ones do for half the price.

Best Budget Pick: ICECO VL45 – Surprisingly tough little workhorse that won’t break the bank.

Comparison Table

ModelCapacityApprox. PriceWeightPower Draw (Eco)Dual Zone?App Control?Best For
Dometic CFX5 4546L$1,050–1,20048 lbs~40WNoYesSerious overlanders
BougeRV Rocky 55QT55QT$550–65052 lbs45WYesYesFamilies & weekenders
ICECO VL4545L$420–52042 lbs48WNoYesBudget-conscious adventurers
Anker SOLIX EverFrost 240L$900–1,10055 lbsVariableNoYesOff-grid with built-in battery
ARB Zero 4747QT$1,100–1,30062 lbs~50WYesNoRugged overlanding
Travoca Rigel 4545L$750–85058 lbsSuper lowYesNoEfficiency nerds

In-Depth Reviews

Dometic CFX5 45 – My Go-To Best Camping Fridge

Okay, confession time: I was skeptical about spending over a grand on a cooler. Then I took the CFX5 45 on a 10-day Pacific Northwest road trip and it never dipped above 34°F even when ambient hit 95°.

Pros: Vacuum-insulated panels, variable-speed compressor, killer app that lets you monitor from your tent, three-stage battery protection. It actually makes ice if you want. Cons: Pricey, no wheels (I added a separate cart), heavier than some budget options. Who it’s for: Folks who camp hard and want zero stress about food safety.

Honestly? This is the best camping fridge I’ve ever used. I’ve recommended it to three buddies already and they all bought one. Check latest price on Amazon or head to Dometic’s site for full specs.

BougeRV Rocky 55QT Dual Zone – The Family Hero

We took this one to a week at the lake with my sister’s crew (four adults, three kids, one very opinionated dog). The dual zones were a lifesaver—frozen treats on one side, actual dinner ingredients on the other.

Pros: Removable divider, surprisingly quiet, great app, handles rough dirt roads without drama. Cons: The add-on battery is extra, no built-in wheels. Who it’s for: Anyone with kids or who likes ice cream at camp.

At around $600 it’s the sweet spot where you get premium features without the heart attack at checkout. This might be the best camping fridge for most normal humans.

Read more : Best Cold Brew Tea Maker in 2026

ICECO VL45 – The Underdog That Punches Way Above Its Weight

I picked this up on a whim during a Black Friday deal and honestly expected it to die on the first rough trip. It didn’t. It’s been to the desert, the beach, and a muddy music festival.

Pros: SECOP compressor (same as the big boys), fast cooldown, solid build for the money, app works great. Cons: Single zone, plastic feels a tad cheaper, latches aren’t as bombproof. Who it’s for: First-timers or anyone who wants 80% of the performance for half the price.

If you’re dipping your toes into the best camping fridge world, start here.

Anker SOLIX EverFrost 2 – Off-Grid Beast Mode

The built-in removable battery is genius. We left the truck at base camp for two days and this thing kept running on its own power. Cooled from 77°F to 32°F in 15 minutes—wild.

Pros: 36+ hours on battery, flip-up table, rugged wheels. Cons: Heavy when battery is attached, premium price.

Perfect if you’re going full van-life or boondocking.

ARB Zero 47 & Travoca Rigel 45

ARB is the tank—looks like it could survive a zombie apocalypse. Travoca wins on pure efficiency thanks to those vacuum panels. Both excellent, both expensive. I’d buy either again in a heartbeat for the right trip.

Other Solid Options Worth a Look

  • Engel – Old-school reliability, made to last forever.
  • Alpicool CF45 – Under $300 and still gets the job done for short trips.
  • National Luna – South African legend if you want dual-zone luxury.
  • Bluetti Multicooler – Built-in ice maker? Yes please (if you have deep pockets).

FAQ

How big of a best camping fridge do I actually need?

For two people, 35-45L is perfect. Families? Go 50L+. Measure your vehicle space first—I learned that the hard way when my first 75QT wouldn’t fit between the seats.

Will it drain my car battery?

Only if you’re careless (raises hand). Every decent model has low-voltage cutoffs. I set mine to cut at 11.8V and never had an issue.

Compressor or regular cooler?

Compressor every time unless you’re car-camping for one night only. The peace of mind is worth it.

Can I run it on solar?

Absolutely. Pair any of these with a 100-200W panel and a decent power station and you’re golden for weeks off-grid.

Should I get dual zone?

If you have kids or love having ice and cold beer at the same time—yes. Otherwise single zone is fine and usually more efficient.

Final Thoughts

After all the testing, hauling, and occasional “oops I left it on max power” moments, the Dometic CFX5 45 is my undisputed favorite best camping fridge. It just works, every single time, and makes camping feel a little more like glamping without the guilt.

But your perfect best camping fridge depends on your budget, crew size, and how rough you play. The BougeRV or ICECO will make 90% of campers ridiculously happy for a lot less money.

If you’re ready to upgrade your camp kitchen and never deal with soggy sandwiches again, start with whichever model matches your adventure style. Drop a comment with your current setup—I’m always down to nerd out about portable fridges.

Happy camping, stay cool, and may your beer never get warm again.

This post contains affiliate links. If you buy through them, I may earn a small commission at no extra cost to you. Thanks for supporting my blog!

The 10 Best Non-Slip Clothes Hangers for a Tidy Closet

Best Non-Slip Clothes Hangers

10 Best Non-Slip Clothes Hangers for a Tidy Closet

In this article, we’ll explore 10 best non-slip clothes hangers that’ll make your closet a breeze to manage.

best non-slip clothes hangers

Are you tired of dealing with clothes that slip off hangers, causing wrinkles and disorganization in your closet? Non-slip clothes hangers are a game-changer for anyone looking to keep their wardrobe organized and tidy.In this article, we’ll explore the top 10 best non-slip clothes hangers that’ll make your closet a breeze to manage.

You’ve probably dealt with it. That silk blouse slides right off the hanger and hits the floor. Or your favorite sweater stretches out from slipping down. It wastes your time picking up clothes. Plus, it can ruin the shape of your garments over time. Studies show people spend about 30 minutes a week fixing messy closets. That’s time you could use elsewhere.

Non-slip hangers fix this mess. They grip your clothes tightly without damage. You save space and keep things looking sharp. These hangers come in velvet, rubber, or wood styles. Each type suits different needs. This guide picks the top 10. We look at what works best for shirts, pants, or coats. And we cover budgets from cheap packs to fancy sets. Stick around to find picks that fit your closet.

10 best non-slip clothes hangers

  1. Amazon Basics Slim Velvet Hangers:
  2. Honey-Can-Do Steel Epoxy Hangers
  3. Whitmor Wood Suit Hangers
  4. Neatfreak Clip Hangers
  5. Mainstays Flocked Non-Slip Set

Understanding Non-Slip Hanger Technology: Materials and Benefits

Non-slip hangers use smart designs to hold clothes steady. They beat old wire ones that bend easily. You get fewer wrinkles and longer-lasting outfits. Let’s break down the main types. Each has perks for daily use.

Flocked Velvet Hangers: The Industry Standard for Soft Grip

Velvet hangers have a soft layer of tiny fibers. This flocking creates grip without snags. They measure just a quarter inch thick. That means more room in your closet for extra clothes.

These work great on soft items like dresses or tees. No more shoulder dents from hard edges. Users love how they feel smooth on skin. Pick them if you hang delicates often.

Rubberized and Plastic Hangers: Durability Meets Grip

Rubber edges on plastic bases add tough grip. They handle water better than fabric ones. No rot from damp towels or swimsuits. These last years without breaking.

Go for them in laundry spots or garages. Heavy jeans stay put on grooved bars. They cost a bit more but save money long-term. You avoid replacing weak hangers.

Specialty Hangers: Wood with Notches and Accessory Bars

Wood hangers mix style with grip features. Rubber strips on shoulders stop slips. Some have bars for ties or belts. This keeps outfits together neat.

They suit suits or dressy looks. Search for luxury non-slip options if you want polish. These blend function and looks in one piece.

Top 10 Non-Slip Hangers Reviewed: Performance Across Categories

We tested dozens for this list. Focus stayed on grip, strength, and price. Each pick shines for certain clothes or spaces. Here’s the ranking from everyday winners to specialty stars. We note brand, material, and top uses.

1. Amazon Basics Slim Velvet Hangers

best non-slip clothes hangers

These flocked velvet ones come in 50-packs for under 20 bucks. They grip silk shirts tight. Hooks won’t rust or bend easily. Best overall value for big closets. Users say no more floor piles after a month.

2. Honey-Can-Do Steel Epoxy Hangers

best non-slip clothes hangers

Rubber-coated steel for heavy loads. Holds coats up to 20 pounds. Slim design saves space. Great for winter gear or bags. They resist bends better than wood.

3. Joy Mangano Huggable Hangers

best non-slip clothes hangers

Thick velvet flocking on plastic. Super soft on lace bras. Won’t leave marks on straps. Packs of 10 cost around 15 dollars. Ideal for intimates and light tops.

4. Whitmor Wood Suit Hangers

best non-slip clothes hangers

Cedar wood with rubber shoulders. Natural scent fights moths. Wide shape fits jackets perfect. Each handles 15 pounds. Luxury feel for dress pants too.

5. Neatfreak Clip Hangers

best non-slip clothes hangers

Plastic with vinyl clips for skirts. Adjustable bars prevent creases. Grips hems without pulls. Set of 20 goes for 12 bucks. Top pick for bottoms in small spaces.

6. Cascade Slimline Hangers

best non-slip clothes hangers

Velvet base with linking hooks. Stack five shirts high without tilt. Saves rod space by half. Users stack dresses easy. Budget-friendly at 30 for a dozen.

7. Mainstays Flocked Non-Slip Set

best non-slip clothes hangers

Affordable plastic with flocked arms. Good for kids’ clothes or tees. Hooks swivel smooth. 30-pack under 10 dollars. Everyday use without fuss.

8. Woodlore Premium Suit Hangers

best non-slip clothes hangers

Hardwood with notches for pants. Leather-like grip on shoulders. Polished finish looks classy. Each costs five bucks. Best for men’s suits or blazers.

9. Brightroom Rubber Grip Hangers

best non-slip clothes hangers

All-rubber for wet items. Hangs towels or robes secure. Won’t mildew in bathrooms. Set of eight for 18 dollars. Tough for humid spots.

10. ClosetVo Multi-Function Hangers

best non-slip clothes hangers

Wood with accessory bars and clips. Holds belts, scarves, plus tops. Non-slip coating everywhere. Pricier at 25 for four. Perfect for organized wardrobes.

These top non-slip clothes hangers cover most needs. Velvet rules for soft fabrics. Wood wins for structure. Mix them based on your wardrobe.

Actionable Tips for Maximizing Your Non-Slip Hanger Investment

You bought the hangers. Now use them right to get the most out. Simple habits keep clothes fresh. Follow these steps for a pro setup.

How to Properly Hang Different Garment Types

Fold sweaters across the bar. Don’t drape over shoulders or they’ll sag. For wide-neck tops, use clips to pin fabric flat. Pants go on trouser bars upside down. This stops creases at the knee.

Hang dresses by straps on curved tops. Button shirts fully before hooking. These tricks cut wrinkles by half. Your outfits look store-fresh every day.

Checking for “Shoulder Bumps” and Garment Damage

Look for dents after a few wears. Bumps mean the hanger shape don’t match your clothes. Test by running fingers along shoulders. Soft velvet hides marks better than hard plastic.

Wipe flocking monthly to remove dust. If it sheds, replace soon. This keeps grip strong. Save your knits from pulls or tears.

Integrating Non-Slip Hangers into Existing Closet Systems

Match hook sizes to your rod. Quarter-inch velvet fits tight spaces best. Pick chrome hooks for metal rods. Bronze works with wood tones.

Group by type: delicates on one end, coats on the other. Add dividers if needed. This setup makes mornings quick. You grab and go without mess.

Longevity and Purchasing Pitfalls to Avoid

Quality varies a lot. Cheap ones fail fast. Spot the good stuff to save cash. Learn these traps before you buy.

Detecting Cheap Knock-Offs: Hook Quality and Adhesion Failure

Feel the flocking right away. If it rubs off on your hand, toss it. Weak hooks bend with one coat. Check reviews for real load tests.

Buy from trusted spots like big stores. Avoid super-low prices on no-name brands. Real velvet lasts two years or more.

Considering Climate: Humidity and Mold Resistance

In damp areas, skip untreated wood. It warps quick. Go for plastic or coated metal instead.

Rubberized ones handle steam fine. They dry fast after showers. This choice keeps your closet fresh year-round.

Conclusion: Reclaiming Your Closet with Friction

Non-slip hangers change everything. Slim velvet saves space and grips light clothes best. Sturdy wood supports heavy suits without sags. These top 10 picks fit budgets and needs.

Grab a set today. Your clothes stay put, and your closet turns tidy. Mornings get easier. You focus on the day, not the mess. Invest now for clothes that last.

10 Best Chemical-Free Food Storage Containers

Best Chemical-Free Food Storage Containers

In this post, we round up the top 10 best chemical-free food storage containers. We base picks on real user stories, expert tips, and how they hold up in daily life. Whether you need small ones for snacks or big sets for family meals, you’ll find options that match your style. Let’s dive in and find what works for you.

Best Chemical-Free Food Storage Containers

Imagine pulling out last night’s dinner from the fridge. You pop it in the microwave, but a nagging doubt hits. What if tiny bits of plastic chemicals sneak into your meal? Many folks face this worry each day. With more people learning about hidden dangers in everyday items, it’s smart to switch to safer choices.

Awareness of problems like BPA and other plastic additives continues to grow. These substances can harm your health over time. That’s why non-toxic food storage options, such as those from glass or metal, are gaining fans. They keep your food fresh without the risks. Plus, they help the planet by cutting down on waste.

Top picks of Best Chemical-Free Food Storage Containers

1. Glasslock Assorted Oven Safe Container Set

2. Pyrex Freshlock Glass Storage Set

3. Ello Syndicate Glass Food Storage Containers

4. Rubbermaid Brilliance Glass Containers

5. OXO Good Grips Glass Containers

Why Choose Best Chemical-Free Food Storage Containers?

You want to keep your food safe and tasty. Chemical-free containers make that easy. They block nasty stuff from mixing with what you eat. This shift isn’t just a trend—it’s a smart move for your home.

Understanding Chemical Risks in Traditional Containers

Plastics often hide chemicals like BPA, BPS, and phthalates. Heat makes them slip into food more easily. Think of microwaving old takeout boxes. Studies from groups like the FDA show these can mess with your body’s hormones. Even small amounts might affect kids’ growth or your energy levels.

The EPA warns about long-term buildup in the body. It’s not just scary talk—real tests prove it. For peace of mind, skip those risks. Always look for FDA okay or clear BPA-free tags when you shop. That simple check can save you trouble later.

Benefits for Health, Environment, and Longevity

These containers cut your contact with toxins that throw off natural balances. You feel better knowing meals stay pure. No weird tastes or smells from leaching stuff. Health pros link less exposure to better sleep and focus.

On the green side, glass and steel recycle well. They beat plastic that piles up in landfills. One set can last years, so you buy less often. That saves money, too. Pick stackable kits to fit more in your cabinets—maybe free up half your shelf space. It’s a win for your wallet and the earth.

Key Materials to Look For

Borosilicate glass stands out for handling high heat without breaking. It goes from freezer to oven smoothly. Food-grade stainless steel won’t rust or react with sauces. It’s tough for travel. Platinum silicone bends but seals tight, blocking air and germs.

These picks avoid any leaching issues. No chemicals sneak out, even with hot soups. Go for lids with silicone gaskets or bamboo tops. They lock in freshness like a hug for your leftovers. You’ll notice food stays crisp longer.

The 10 Best Chemical-Free Food Storage Containers

We handpicked these based on real tests and reviews. Each shines in safety and ease. They cover glass, metal, and silicone for all needs. Let’s check them out.

1. Glasslock Assorted Oven Safe Container Set

This set uses borosilicate glass that laughs at high heat—up to 450°F. Lids snap on with plastic-free locks for no leaks. Sizes run from 1-cup snacks to 7-cup mains.

Meal preppers love it. Pop it in the oven straight from the fridge. Users say it beats flimsy plastics every time. Great for busy weeks.

2. Pyrex Freshlock Glass Storage Set

Tempered glass here takes bumps well. Colorful lids lock tight and handle microwave chills. Freezer-safe too, no cracks.

Pros use these in big kitchens for trust. Family sets hold enough for dinners. One mom shared how it cut her plastic use in half. Reliable pick.

3. Ello Syndicate Glass Food Storage Containers

Borosilicate builds with silicone seals that block every drip. Stack them for lunch bags. The dishwasher cleans them quickly.

On-the-go folks rave about no spills. Perfect for salads or soups. BPA-free all the way. Easy swap for old Tupperware.

4. Rubbermaid Brilliance Glass Containers

Clear glass lets you see inside fast. Vented lids steam veggies right in. They stack modular for neat storage.

Batch cooks portion meals simply. One tip: Use for weekly prep to control servings. No chemical worries here.

5. OXO Good Grips Glass Containers

Sturdy glass pairs with soft silicone edges for seals that grip. Shapes vary—round for dips, square for stacks. Leak-proof every time.

Home chefs grab these for daily wins. They fit fridge shelves perfectly. Users note that less food goes bad.

6. Stainless Steel Klean Kanteen Food Canisters

18/8 steel keeps things cool or warm. Threaded tops seal acids like tomatoes safely. Portable for hikes.

Picnic fans chill them in fridges easily. No reactions with spicy foods. One hiker said it saved sandwiches all day.

7. U Konserve Stainless Steel Containers

Dent-proof steel with silicone insides stays fresh. Nesting cuts space needs. Reusable for zero trash days.

Eco homes swear by them. Light for bags but tough. Pair with cloth wraps for a full green setup.

8. Stasher Silicone Bags and Containers

Platinum silicone flexes for freezer or boiling. Microwave zaps leftovers quickly. Stand-up style fills without mess.

Ditch zip bags forever. Users boil to clean between runs. One parent loves it for kid snacks—soft and safe.

9. Stasher Silicone Bags and Containers

Recycled glass with bamboo lids seals naturally. Lightweight for shelves. Sturdy for pantry views.

Green thumbs display them proudly. Aesthetic plus function. Keeps nuts crisp for weeks.

Read more: 10 Best and Safe Cooking Utensils for Everyday Kitchen Use

10. LunchBots Stainless Steel Containers

Bento steel splits meals without chemical dividers. Kid latches hold firm. No slip with silicone adds.

Portion for totsis easy. Moms say it makes lunches fun. Durable for drops, too.

Top Criteria for Selecting the Best Chemical-Free Containers

Picking the right one matters. You need gear that fits your routine. We focus on what lasts and works well. This way, you avoid cheap buys that fail fast.

Durability and Heat Resistance

Strong materials take daily beats. Glass that resists cracks handles oven temps up to 450°F. Steel bends but doesn’t break. Tests from spots like Consumer Reports check for shatter-proof builds.

You can microwave or bake without worry. No warping or smells. Try a quick test: Fill with water, heat it, and watch for changes. If it stays cool, it’s a keeper. These traits mean less replacing and more saving.

Airtight Seals and Leak-Proof Design

Good lids stop spills and keep air out. Freshness lasts days longer. Vacuum styles suck out extra air for an even better hold. No soggy bread or wilted veggies.

Flip a full one upside down to test. If nothing drips, grab it. This cuts food waste, too. You save cash and toss less trash.

Size, Variety, and Stackability

From tiny dip holders to big batch keepers, variety rules. Match small for fruits, large for casseroles. Stackable ones nest like puzzle pieces.

They fit tightly in fridges or bags. Save up to half of your space easily. Pick nesting sets for small kitchens. Life gets less cluttered.

Maintenance and Usage Tips for Long-Lasting Performance

Care keeps them going strong. Simple habits pay off big. You extend their life and keep food top-notch.

Cleaning and Care Instructions

Wash glass by hand with soft soap—no scratches. Steel goes in dishwashers fine. Skip rough pads always.

For smells, soak in vinegar water overnight. It wipes them clean. Dry right away to stop spots.

Storage Best Practices

Sort by size in cabinets. Label with markers that erase. Glass hates quick hot-cold jumps—warm slow.

Big ones suit dry stuff like rice. Less air means longer freshness. Rotate the old to the front like a game.

Integrating into Daily Routines

Prep meals on Sunday in a glass. Pack steel for work lunches. Buy in bulk and split into silicone.

Mix types: Glass home, metal out. Use the oldest first to avoid waste. It fits any schedule smoothly.

Conclusion

These 10 chemical-free food storage containers stand out for health and green living. Glasslock and Pyrex lead with heat-proof glass. Steel options like Klean Kanteen shine for travel. Silicone from Stasher adds flex.


Top 5 best Mini Cooler for Room Cooling

Mini Cooler for Room Cooling – AC Portable Mini Fan Arctic Cooler with 7 Colors LED Light: Real Talk Review

Mini Cooler for Room Cooling – AC Portable Mini Fan Arctic Cooler with 7 Colors LED Light: Real Talk Review

Alright, let’s get into it. Summer hits, you’re melting, and honestly, nobody wants to drop hundreds on some monster AC unit. Enter this little guy: the Mini Cooler for Room Cooling—basically a pocket-sized breeze machine with a disco light twist. I gave it a whirl, and here’s my take.

Looks & Build

First impression? Kinde cute, honestly. Sleek, sort of like something Apple would make if they cared about affordable cool air. Super light, so you can just grab it and plop it wherever—bedroom, dorm, kitchen, wherever you’re sweating. The 7-color LED thing? Total mood setter. You can lock in your favorite color or let it cycle through like a tiny rave. Kids dig it, but it’s not too childish for adults either. It’s like, “Yeah, I like my air chilly and my lighting vibey.”

Cooling Game

Now, don’t expect arctic blasts like your dad’s ancient window AC. This thing’s not magic, but for its size? Not bad. It slurps in hot air, runs it through a damp filter, and spits out cooler, slightly humid air. Feels best if you’re sitting right in front of it. Perfect for your desk or by your pillow at night. If you’re expecting it to chill your whole living room, dream on. But for personal space, you’ll actually notice a difference—at least a couple degrees. Oh, and setup is stupidly easy: add water or ice, plug it in (USB, because it’s 2024), and boom, you’re living the breezy life.

How Loud Is It?

I’m picky about noise, especially at night. Good news: It’s basically as quiet as a little desk fan. You’ll hear a soft whir, but nothing that’ll keep you up or mess with your Netflix binge. I had it running while I worked and barely noticed it.

Energy Stuff

Here’s a cool thing: it sips power. No scary electric bills. It’ll run off your laptop, a power bank, whatever—so you can drag it anywhere. Eco-friendly, wallet-friendly, what’s not to like?

The Ups & Downs

**Pros:**

– Tiny, light, and easy to move around

– Stupid simple to use (USB and go)

– Cheap to run, cheap to buy

– Actually quiet

– Disco light action with 7 colors

– Good enough cooling for one person

**Cons:**

– Won’t chill a big room, don’t even try

– Needs a dry room to work best—if you live in a swamp, meh

– Remember to refill the water or it stops being cool (literally)

The Bottom Line

Here’s the deal: If you’re sweating in your cubicle, dorm, or bedroom, this little cooler is a solid buy. It won’t ice out your whole apartment, but for personal use? It crushes. Plus, it looks cool and doubles as a nightlight. For the price, you’re getting convenience, a little style, and actual relief from summer heat. Not perfect, but honestly, nothing this cheap and portable ever is. Worth it for personal spaces—just keep your expectations realistic and your water tank full.