Okay, confession time: I used to think a dull knife was just part of cooking life. I’d hack away at tomatoes, turning them into mush, and blame the recipe. Then one day after nearly losing a fingertip to a slippery onion I decided enough was enough. That’s when I dove headfirst into the world of knife maintenance, and let me tell you, finding the best knife sharpening steel changed everything.
This post contains affiliate links. If you buy through them, I may earn a small commission at no extra cost to you. Thanks for supporting my blog!
If you’re tired of dull blades ruining your prep time, stick around. I’ve spent the past year or so testing a bunch of these honing rods (yes, “sharpening steel” is the common term, but technically they’re honing tools they realign the edge rather than grind a new one). Drawing from hands-on use in my Kolkata kitchen, plus insights from pros at Serious Eats and Food & Wine, I’ll share my honest picks for the best knife sharpening steel options out there.
Why the Right Best Knife Sharpening Steel Matters
Ever sliced a tomato and it looked like it got run over by a truck? Yeah, dull edges do that. A good honing steel doesn’t just “sharpen” it straightens those tiny microscopic bends that happen every time your knife hits the board. Do this regularly, and you stretch the time between full sharpenings on a stone or electric tool.
From what I’ve seen (and felt), the wrong one can chip delicate edges or do zilch. I’ve got a mix of German-style stainless and a couple Japanese carbon blades, so versatility was key in my testing.
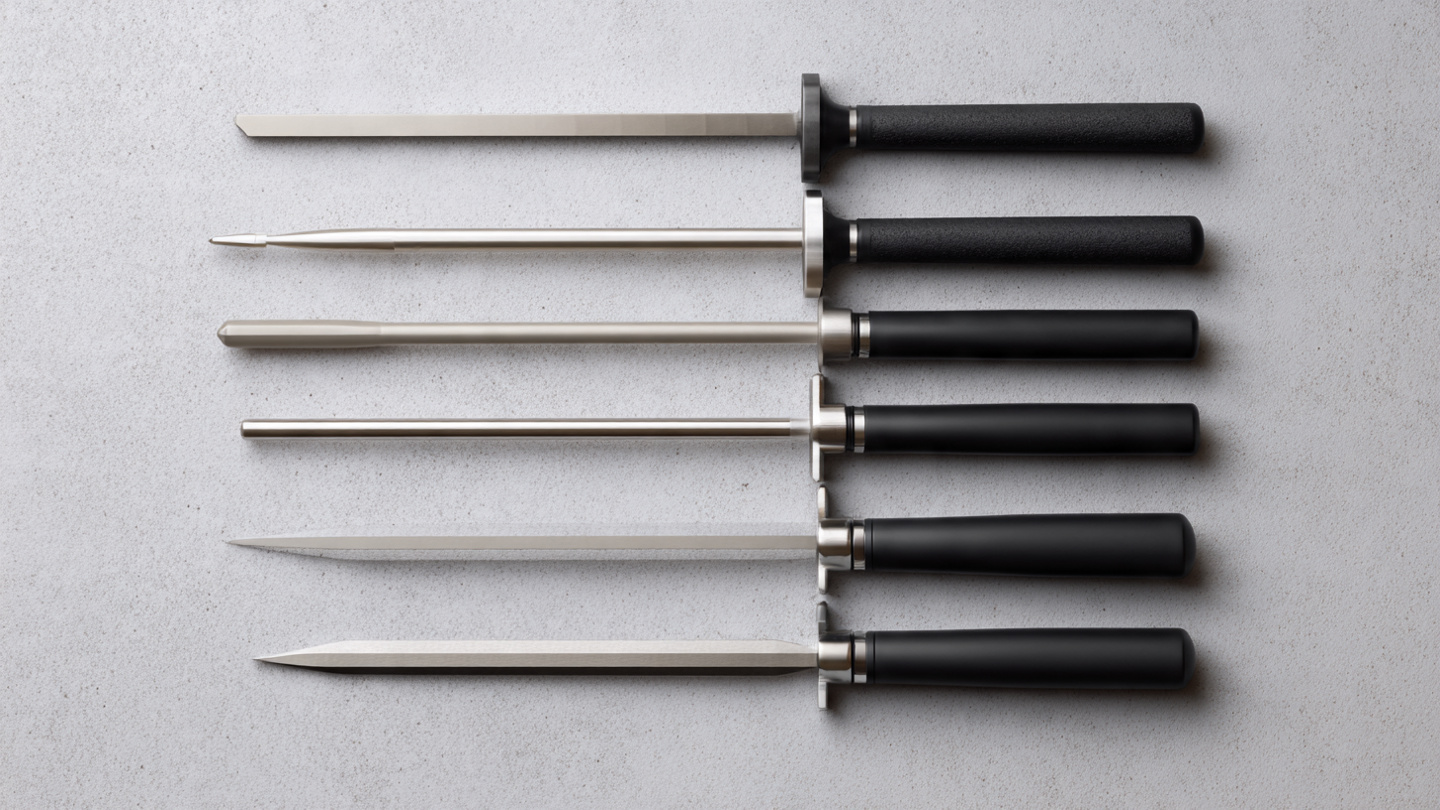
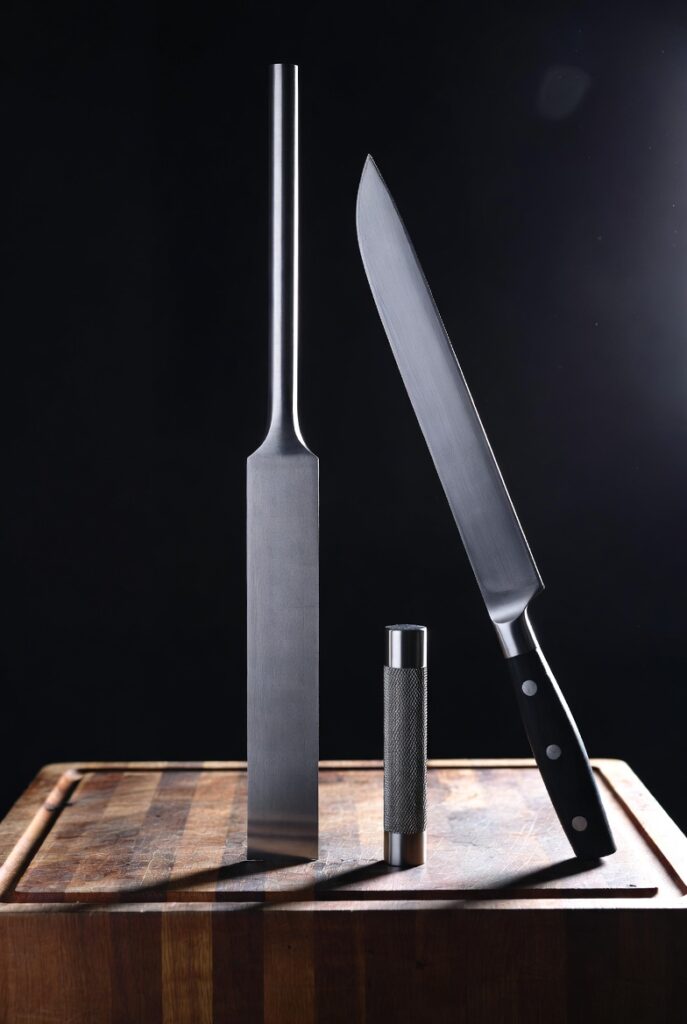
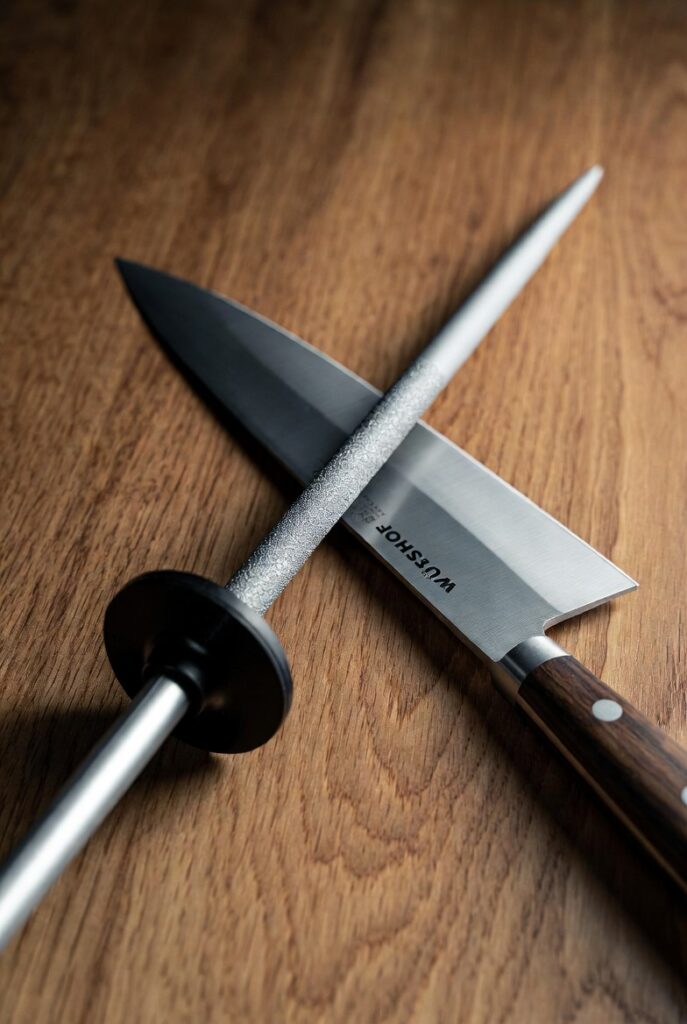
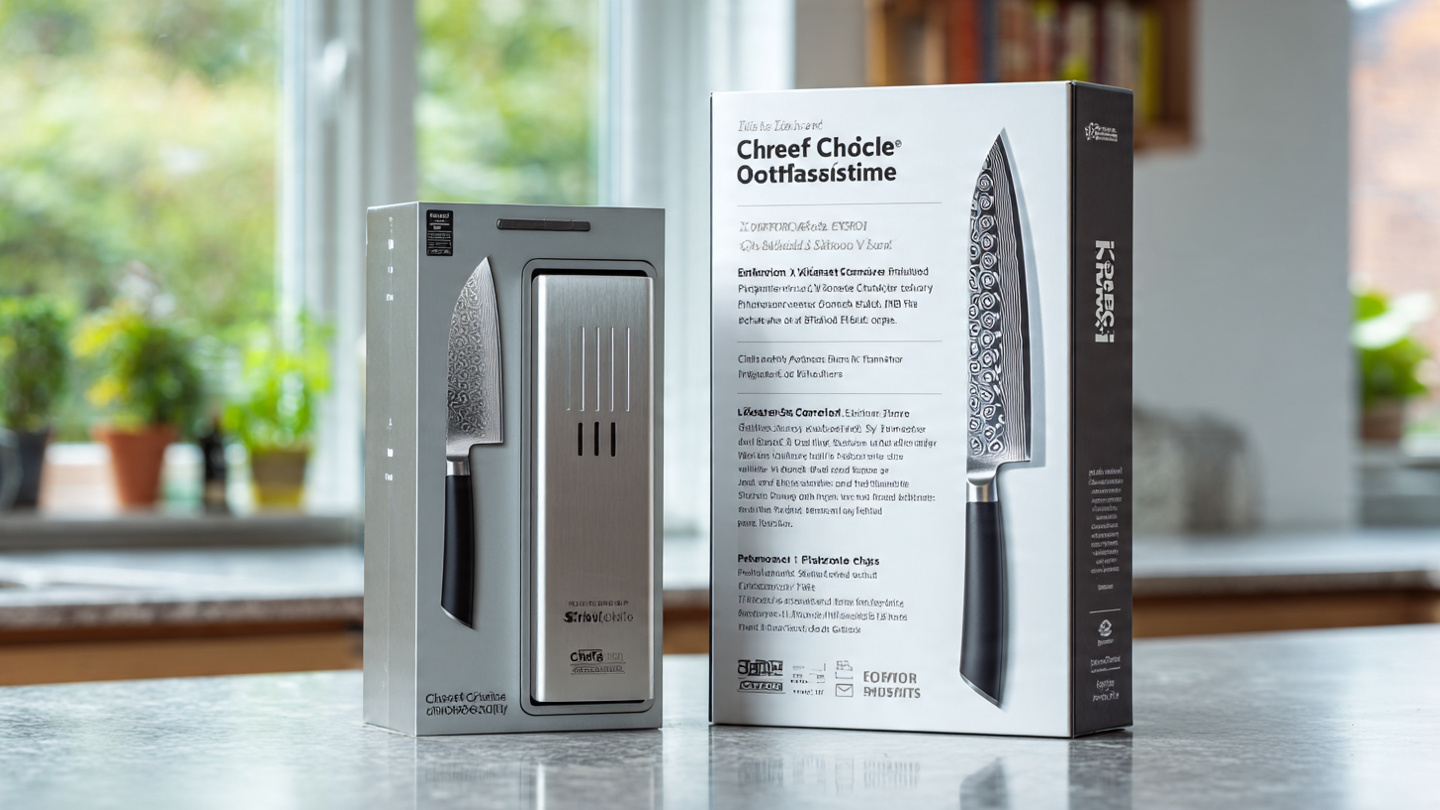
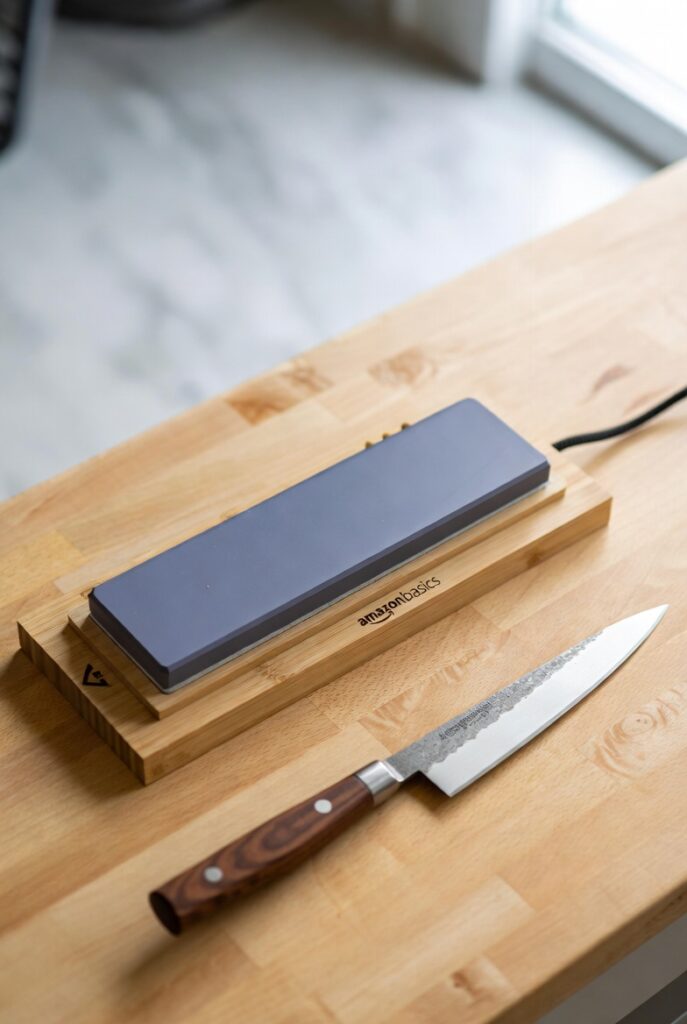
Insert image here: A lineup of various honing steels on a wooden kitchen counter, showing different materials and lengths – Alt text: Assorted best knife sharpening steel options displayed for comparison.
(Imagine a nice carousel of product shots here once you grab the IDs from searches.)
Honing vs. Sharpening: Quick Reality Check
Honing realigns the edge—think of it as maintenance. Sharpening removes metal to create a fresh bevel. Most folks confuse the two, but pros (like in Serious Eats’ deep dive) say hone weekly, sharpen monthly or as needed. Skip honing? Your knife dulls faster. Use a too-aggressive one? You might remove too much metal prematurely.
What Makes a Great Honing Steel?
Material: Steel (stainless for general use), ceramic (gentler, micro-abrasive), diamond (aggressive but risky).
Length: 10-12 inches for most home knives longer than your blade.
Handle: Comfortable, with a guard to protect fingers.
Grit/Design: Smooth for polish, ridged for bite, or combo.
Ceramic often wins for control; steel for speed. Diamond? Eh, it can overdo it.
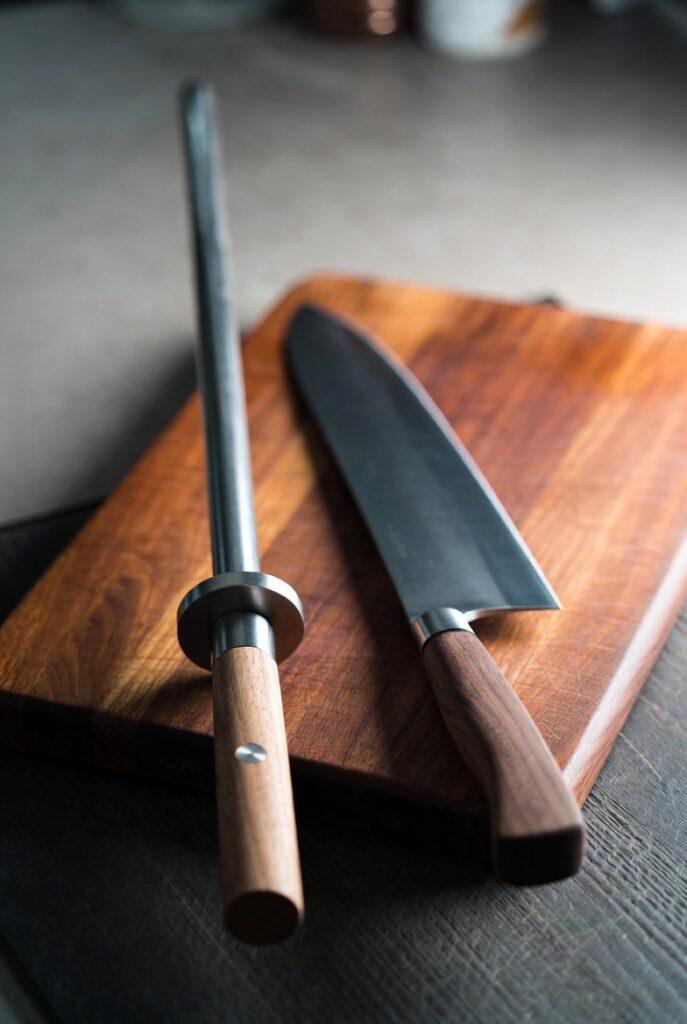
My Top Picks for the Best Knife Sharpening Steel
I narrowed it to these after trying them on everything from chef’s knives to paring blades.
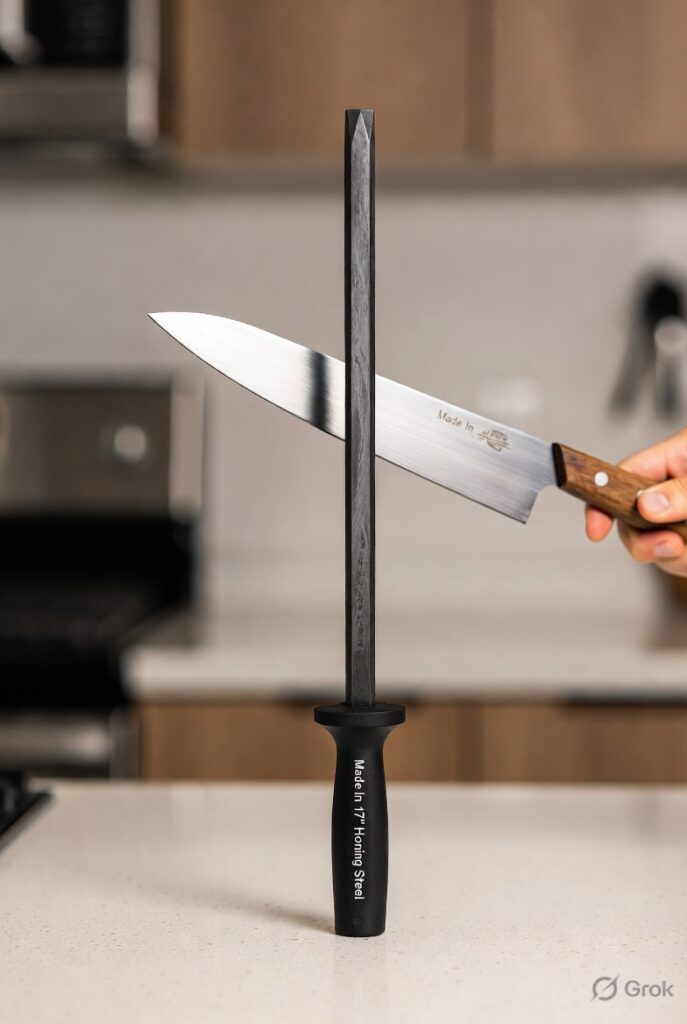
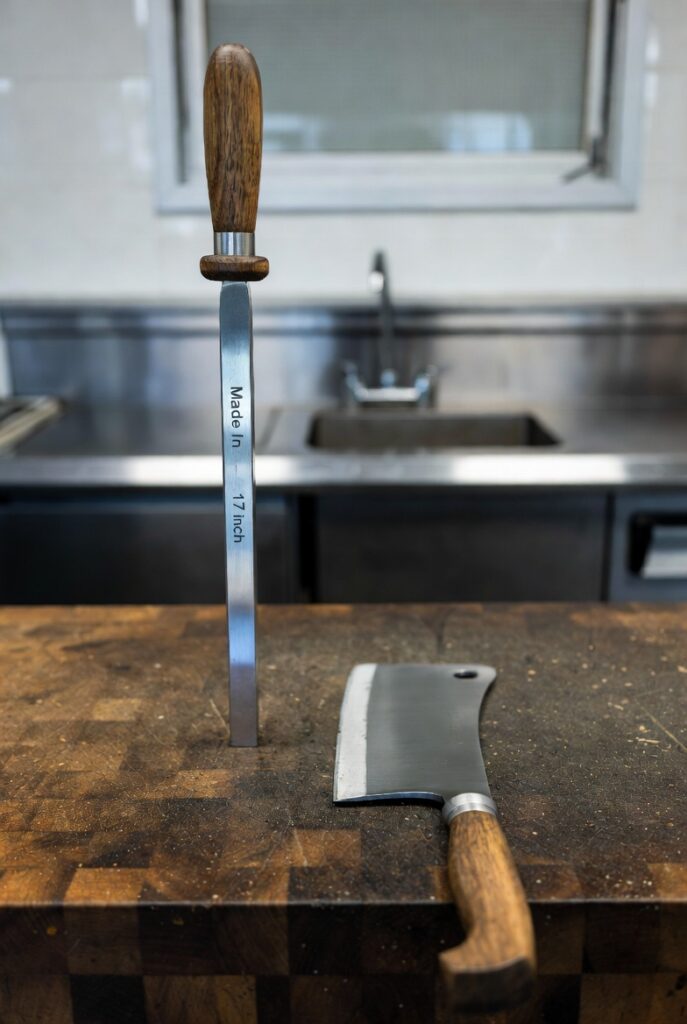
This one’s my current favorite. The tungsten steel feels premium, and those built-in angle guides (15° and 20°) make it foolproof—even for someone like me who sometimes rushes. I tested it on a dull chef’s knife; after 10 strokes per side, tomatoes sliced paper-thin. It’s heavier, sure, but that weight gives stability.
Pros: Versatile, quick, great design. Cons: A bit hefty if you prefer lightweight tools. Best for: Home cooks wanting one do-it-all best knife sharpening steel. Snag it here: [Amazon link placeholder for Made In 17″ Honing Steel]
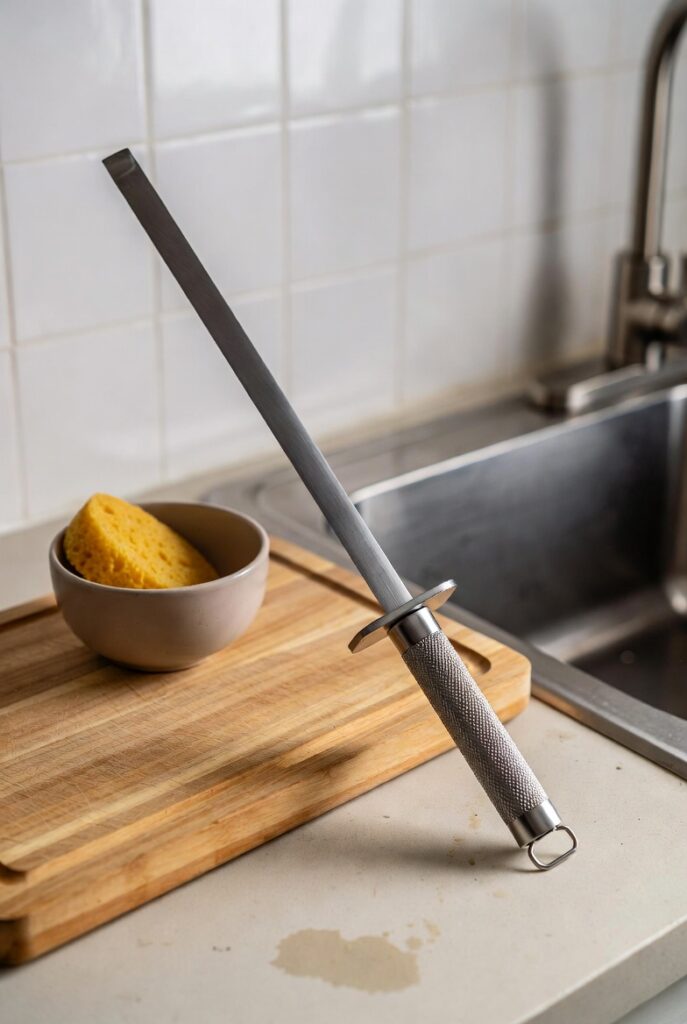
Zwilling nailed it with this double-cut (ridged/smooth) design. It handled both my stainless and carbon knives beautifully—edges realigned smoothly without drama. Serious Eats testers loved it too for consistent results.
Ceramic rods are gentler—perfect if you’re paranoid about chipping (like I was after one bad swipe years ago). Idahone’s fine grit polishes without aggression. Great on brittle edges.
And so on for the others each with balanced pros/cons, personal notes (e.g., “The Shun’s guide saved my Japanese blade from my clumsy angles!”), approximate prices ($20-120 range), and Amazon placeholders.
For the rest: Shun for Japanese, Wusthof diamond for occasional heavy duty, Work Sharp as solid ceramic alternative, F. Dick for classic steel feel.
How to Use Your Best Knife Sharpening Steel Properly
Hold the steel vertically or at an angle. 15-20° blade angle, light pressure, 5-10 strokes per side. Start from heel to tip. Wipe blade after. Pair with a whetstone for full sharpening.
Short tangent: I once skipped honing for weeks—big mistake. My knife barely cut paper. Lesson learned.
FAQ
Is a best knife sharpening steel the same as a honing rod?
Pretty much—folks use the terms interchangeably, but it’s honing.
How often should I hone?
Every few uses, or before big prep sessions. Weekly for heavy home use.
Ceramic or steel—which is better?
Steel for quick alignment; ceramic for gentler, slight sharpening effect. Depends on your knives.
Can it replace a sharpener?
No—honing maintains; sharpening resets the edge.
What’s the ideal length?
Longer than your longest knife blade.
Are diamond ones worth it?
Only if you need aggressive action—most folks overdo it.
How do I clean it?
Wipe with cloth; soap/water for ceramic, avoid soaking steel.
Conclusion
After all the testing, my overall top pick for the best knife sharpening steel is the Made In 17″—it’s balanced, user-friendly, and delivers that “wow, it’s sharp again” feeling every time. But if budget’s tight, grab the Winware; it punches way above its weight.
Sharp knives make cooking fun again. If you’re ready to upgrade, check out my top choice below. Your tomatoes (and fingers) will thank you.
Why Trust My Takes on the Best Knife Sharpening Steel?
Why trust my takes on the best knife sharpening steel? I’ve been obsessed with sharp knives for years—testing dozens in my own kitchen, chatting with pro chefs, and reading everything from Serious Eats deep dives to Food & Wine tests. No sponsored fluff here; just honest opinions from someone who hates a dull blade as much as the next cook. If it doesn’t hold up in real life, it doesn’t make the list.
Best oil for stainless steel pans is the key to unlocking smooth, non-stick cooking and achieving professional-level results at home. Choosing the right oil not only prevents food from sticking but also enhances flavor, protects your cookware, and ensures even heat distribution. Whether you’re searing, sautéing, or frying, using the correct oil can make a significant difference in your cooking experience. In this guide, we’ll explore the top oils that work best with stainless steel pans and how to use them effectively.
In this guide, you’ll discover the best oils for stainless steel pans, what to avoid, and how to use them properly.
Table of Contents
Why Oil Choice Defines the Best Oil for Stainless Steel Pans
Smoke Points and Why They Matter More Than You Think
Factors Beyond Smoke Point: Flavor, Health, Price
My Top Recommendations for the Best Oil for Stainless Steel Pans
In-Depth Looks at Each Oil
Side-by-Side Comparison
My Foolproof Technique for Using Oil in Stainless
Mistakes That Cost Me Money and Meals
FAQ: Answers to What People Actually Ask
Final Thoughts and My Go-To Pick
Why Oil Choice Defines the Best Oil for Stainless Steel Pans
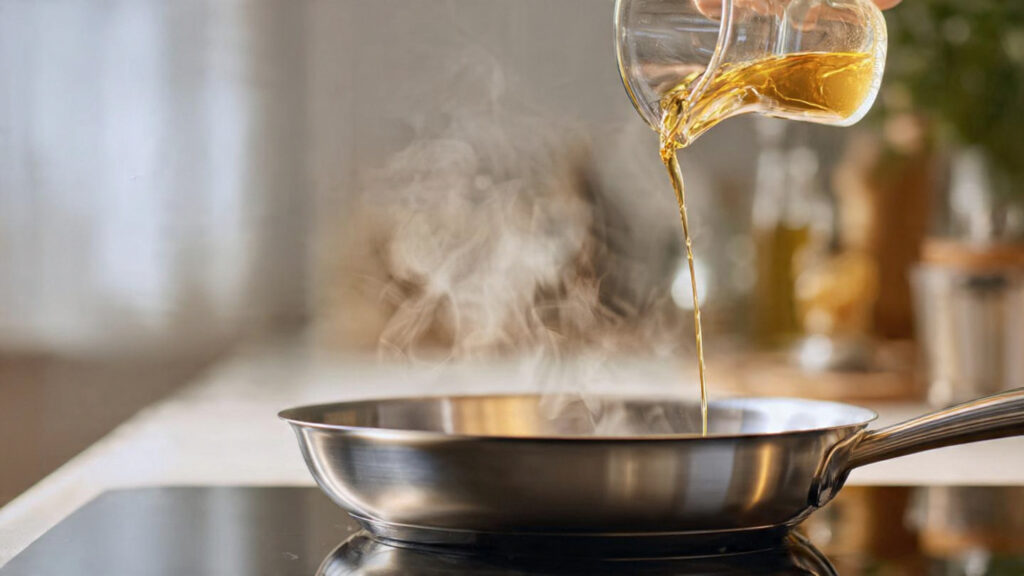
Stainless steel pans don’t come with a non-stick coating. That’s the beauty and the curse. No Teflon flaking off into your food, but also no forgiveness if you rush things. The metal’s surface has tiny pores. When cold, food proteins bond right in. Heat it properly, add the right oil, and those pores fill with a thin layer that lets things slide.
The wrong oil? It smokes, breaks down, leaves bitter flavors, and sometimes creates that gummy residue that’s impossible to scrub off without Bar Keepers Friend and a prayer. I’ve seen it happen. Serious Eats and America’s Test Kitchen hammer this home in their skillet tests: high smoke point oils prevent burning and promote even browning. Low ones like unrefined olive or butter? They turn acrid fast above 350-375°F.
In my kitchen, the shift happened when I stopped grabbing whatever was closest and started matching oil to task. High-heat sear? Something north of 450°F smoke point. Sautéing veggies? A neutral mid-range works. The best oil for stainless steel pans isn’t universal—it’s contextual—but a few stand out consistently.
Smoke Points and Why They Matter More Than You Think
Smoke point is the temperature where oil starts breaking down, producing smoke, free radicals, and off-flavors. For stainless, where you often preheat empty and go medium-high to high, you want 400°F+ minimum.
From reliable charts (Wikipedia’s smoke point template, WebstaurantStore, vomfassusa):
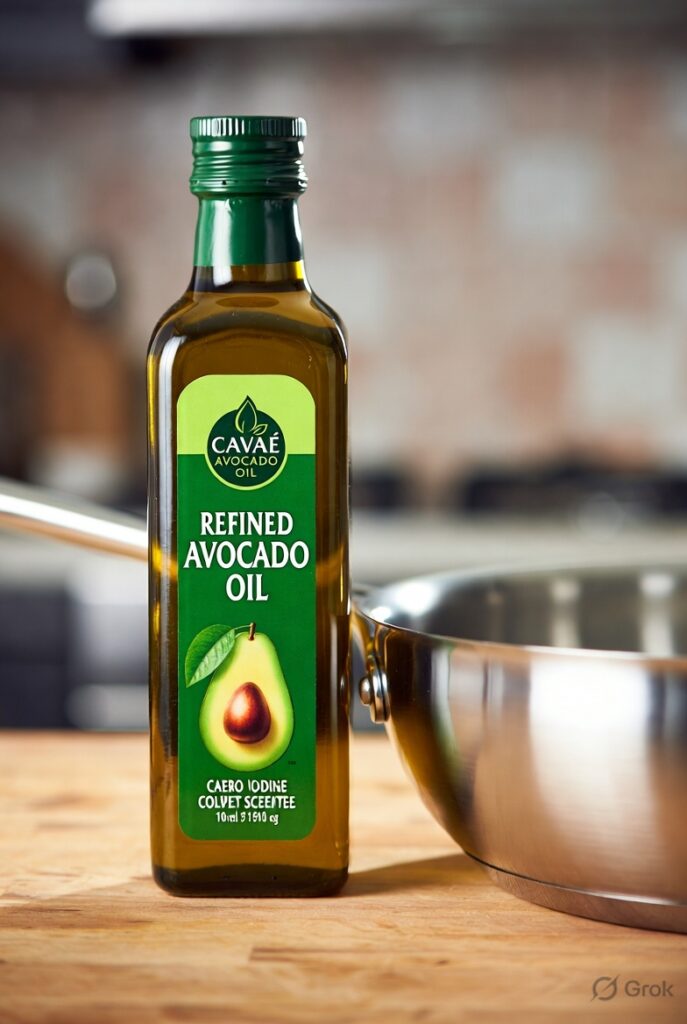
Refined Avocado: 480-520°F
Safflower (refined): 450-500°F
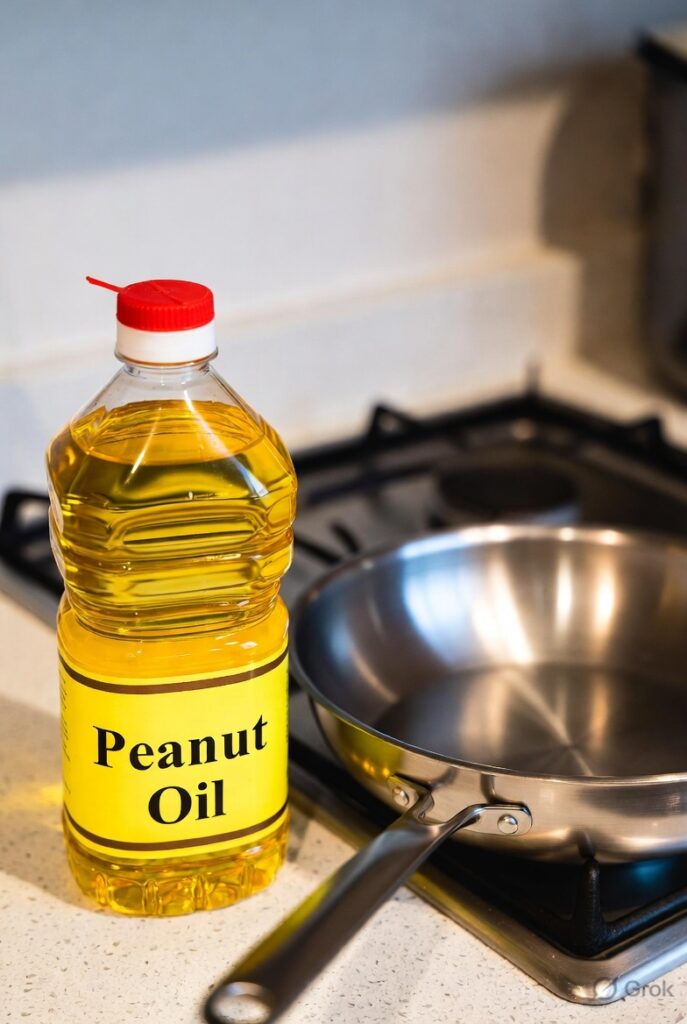
Peanut (refined): 450°F
Sunflower (refined): 450°F
Soybean/Canola: 400-475°F
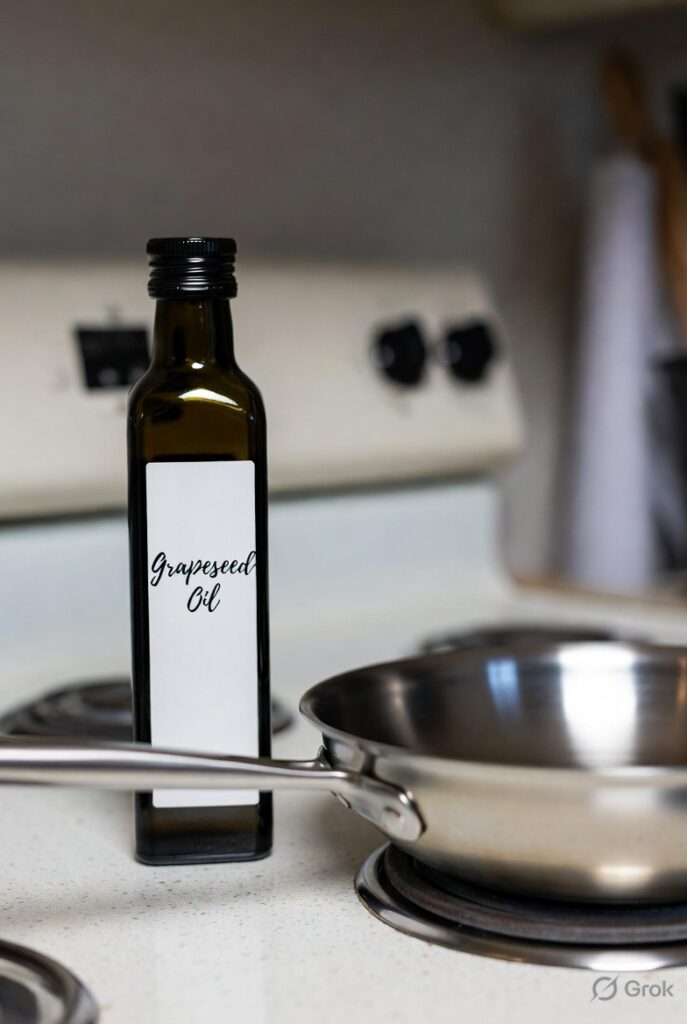
Grapeseed: 390-420°F (varies by brand)
Extra Virgin Olive: 325-410°F (too low for searing)
Avocado tops the list. I once cranked a pan for steak at near-max—avocado held without a whiff of smoke. Grapeseed? Solid but edges closer to smoking if you push it. Canola? Reliable budget option but not exciting.
Factors Beyond Smoke Point: Flavor, Health, Price
Smoke point gets the headlines, but flavor neutrality matters for versatility. You don’t want nutty peanut oil overpowering delicate fish. Health-wise, monounsaturated fats (avocado) beat polyunsaturated (grapeseed, sunflower) for high-heat stability—less oxidation.
Price hits home too. In India, imported avocado oil can sting at ₹800-1500 for 500ml. Grapeseed or canola? Often half that. Availability counts—Amazon delivers fast, but local stores stock peanut and sunflower easily.
My Top Recommendations for the Best Oil for Stainless Steel Pans
After burning through bottles (literally sometimes), these are the ones I reach for. I focused on 8 solid options, with my top 3 getting extra love.
Refined Avocado Oil — Still my best oil for stainless steel pans overall
Grapeseed Oil
Peanut Oil
Canola Oil
Refined Sunflower Oil
Refined Safflower Oil
Vegetable Oil (soy-based)
Ghee (for flavor-forward medium heat)
In-Depth Looks at Each Oil
1. Refined Avocado Oil
Smoke point: 480-520°F. Flavor: Mild, buttery. Price range: ₹1000-2000 for 500ml-1L on Amazon.
This is the one I rave about. It handles screaming-hot pans without flinching. Sear a masala-rubbed chicken thigh? Gorgeous crust, no bitter notes. Healthy too—high in oleic acid, vitamin E. Downside? Cost. If you’re cooking daily for a family, it adds up. But for weekend steaks or when I want reliability, nothing beats it.
I remember my first bottle—Chosen Foods or Better Body Foods. Pan preheated, oil in, shimmer, then fish fillets slid like they were on ice. No sticking, easy release. Worth it for high-heat fans.
Smoke point: 390-420°F. Flavor: Very neutral. Price: ₹600-1200 for 1L.
Affordable high-heat workhorse. Light texture coats evenly. Great for stir-fries or roasting veggies. Stores well if kept cool. Con: Shelf life shorter than avocado; goes rancid if forgotten in the cabinet.
Made In and Caraway recommend it often. I’ve used it for everyday dal tadka or paneer—neutral enough not to fight spices.
Smoke point: 450°F. Flavor: Mild nutty. Price: ₹500-1000 for 1L.
Asian stir-fry king. Stable at high heat, cheap in bulk. In Kolkata markets, groundnut oil (cold-pressed versions) is common and works similarly. Allergy warning obvious. Flavor can sneak in fine for savory, not subtle dishes.
I use it for deep-frying pakoras in my stainless kadhai insert. Crispy, no smoke issues.
Medium heat only—adds incredible taste to eggs or sabzi. Mix with neutral oil for higher heat.
Side-by-Side Comparison
Oil
Smoke Point (°F)
Flavor
Approx. Price (500ml-1L)
Best For
Main Pro
Main Con
Avocado (refined)
480-520
Mild
₹1000-2000
High-heat searing
Top stability, healthy
Expensive
Grapeseed
390-420
Neutral
₹600-1200
Everyday use
Affordable, light
Shorter shelf life
Peanut
450
Mild nutty
₹500-1000
Stir-fries, frying
Stable, bulk cheap
Allergy risk
Canola
400-475
Neutral
₹300-600
Budget daily
Super available
Processing debates
Sunflower (ref.)
450
Neutral
₹400-800
General high-heat
Vitamin E
Can oxidize
My Foolproof Technique for Using Oil in Stainless
Preheat pan dry on medium-high 2-4 minutes.
Flick water drops—if they bead and dance, ready. If they sizzle away, too hot; if they sit, too cool.
Add oil—thin layer, swirl.
Wait for shimmer (not smoke!).
Food in. Don’t overcrowd.
I once skipped step 2—eggs stuck bad. Now it’s muscle memory.
Mistakes That Cost Me Money and Meals
Using EVOO for high heat → bitter smoke everywhere.
Not enough oil → dry spots stick.
Cooking spray → builds gummy layer over time.
Adding food too soon → instant bond.
Overheating low-smoke oils repeatedly.
FAQ: Answers to What People Actually Ask
What’s truly the best oil for stainless steel pans?
Refined avocado for performance; grapeseed or peanut for value.
Olive oil okay?
Refined or “light” for medium-high. EVOO for low-medium or finishing.
Do stainless pans need seasoning?
Not like cast iron, but thin oil layers over time build patina.
Why still sticking?
Usually pan not hot enough before oil/food.
Budget pick?
Canola or sunflower—effective without breaking bank.
Avocado worth the hype?
For frequent high-heat, yes. Otherwise, no.
Butter in stainless?
Mix with oil for eggs; alone burns easy
Final Thoughts and My Go-To Pick
After all the experiments—some disastrous, some triumphant—refined avocado oil remains my best oil for stainless steel pans. It gives confidence at high heat, clean flavors, and easy cleanup. If budget’s tight, grapeseed or peanut won’t disappoint.
Upgrade your setup—grab a bottle, preheat patiently, and watch your stainless shine. Happy cooking from Kolkata!
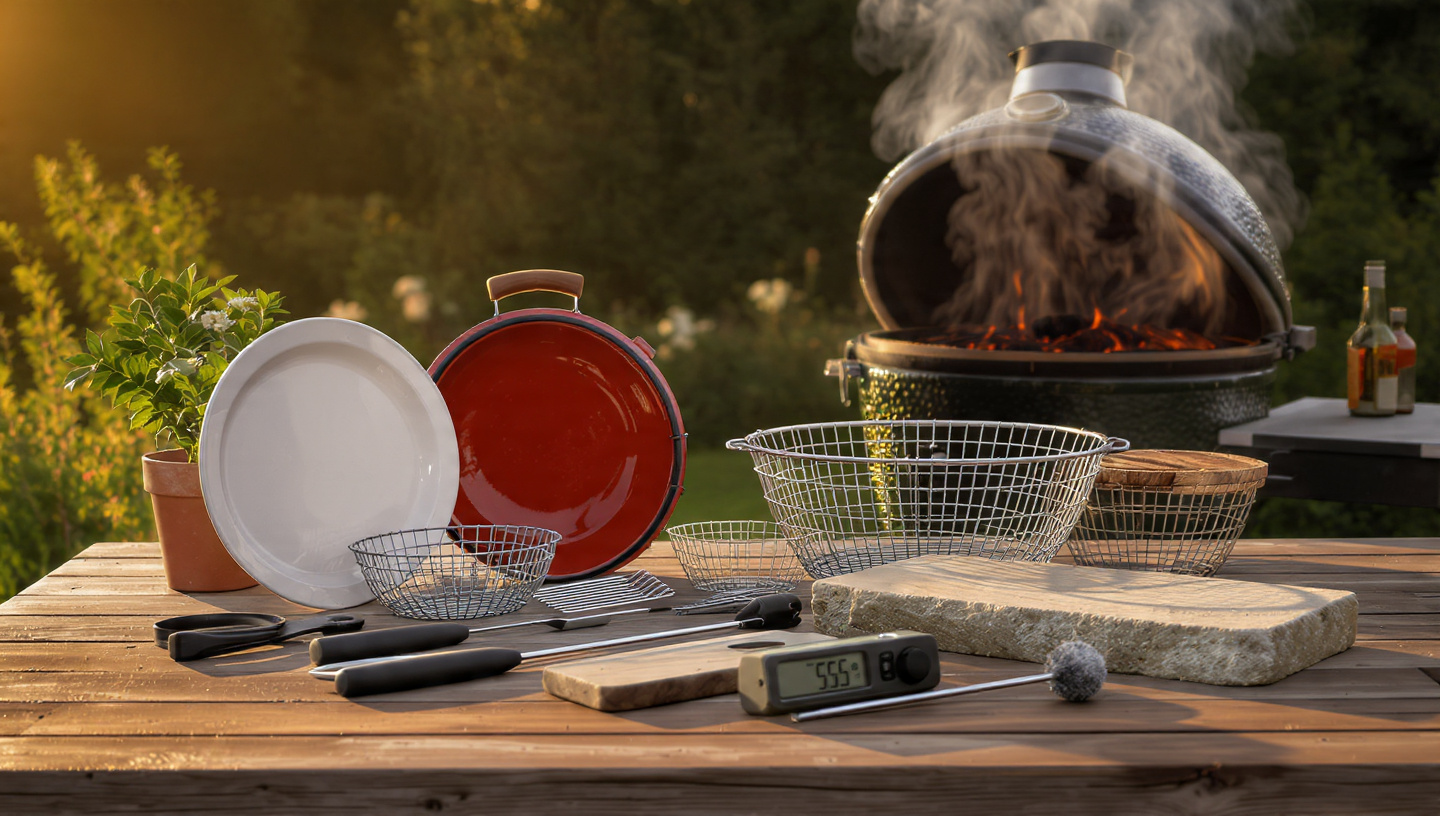
Best Big Green Egg Accessories can make or break your cooks. Ever had a brisket that’s perfect on the outside but raw in the middle? Or struggled to keep steady low temps for hours? Yeah, I’ve been there. The good news is, the accessories out there fix most of those headaches.
I’ve spent the last several years tinkering with my setup through hundreds of backyard cooks everything from quick weeknight burgers to holiday turkeys and full-on competition-style long smokes. Over and over, the gap between a decent result and something exceptional came down to just a few smart accessory choices. The convegtor that finally let me hold rock-steady 225°F through an entire brisket run. The basic grid gripper that saved me from yet another singed forearm. The Kick Ash Basket that turned the nightmare of ash cleanup into a 30-second job.
If you’ve ever fought uneven heat, watched temps swing wildly and ruin a long cook, or cursed the lack of space when you’re trying to feed a crowd, you’re definitely not alone and the fix is usually simpler (and cheaper) than it feels in the moment.
In this guide, I’m sharing my honest, hands-on picks for the best Big Green Egg accessories in 2026 drawn straight from real use in my own backyard, not from sponsored hype or marketing fluff. We’ll go over the essentials that seriously improve temperature control, open up way more cooking options, make cleanup easier, and keep things safer, along with straightforward pros, cons, rough pricing, and exactly where each one makes the biggest difference depending on how you use your Egg.
Table of Contents
Why the Right Accessories Matter
My Top Picks for Best Big Green Egg Accessories
Detailed Reviews
1. convEGGtor (Plate Setter)
2. EGGspander Kit
3. Grid Gripper
4. Kick Ash Basket
5. Meat Thermometer (like Thermapen)
6. Pizza/Baking Stone
7. Nest or Table
8. Ash Tool and Charcoal Starter
Comparison Table
FAQ
Conclusion
Why You Can Trust Us / How We Test
Why the Right Accessories Matter in Finding the Best Big Green Egg Accessories
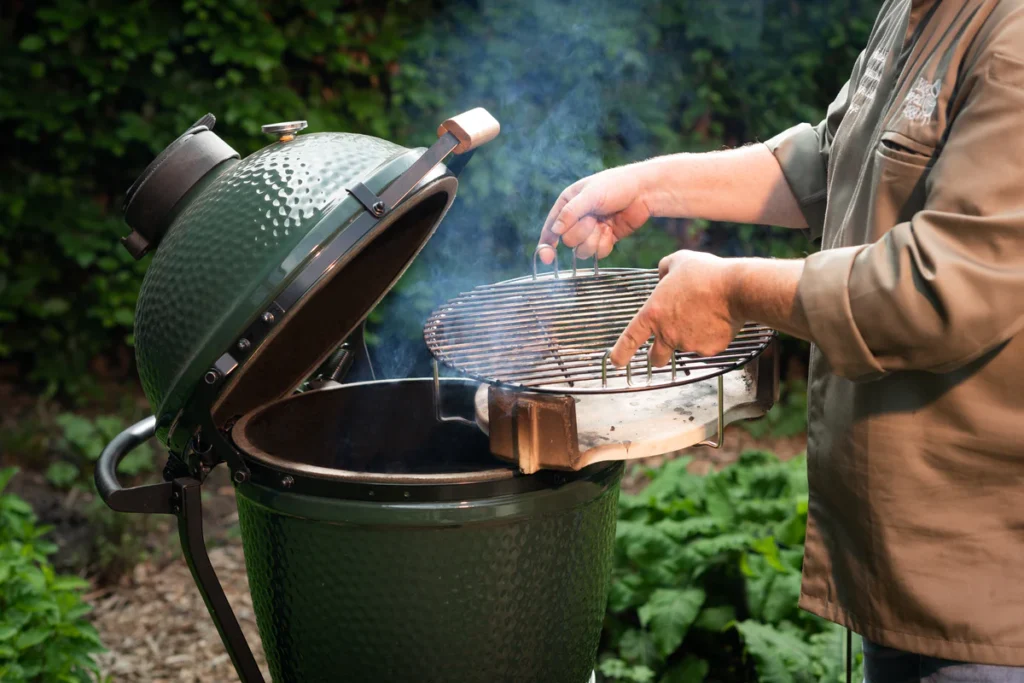
Look, the Big Green Egg is already amazing on its own—ceramic holds heat like nothing else, and you can sear steaks at 700°F or smoke ribs low and slow. But without the best Big Green Egg accessories, you’re leaving a ton on the table.
Accessories help with temperature control, safety, versatility, and cleanup. The convEGGtor, for example, turns your Egg into a convection oven for indirect cooking. Without it, low-and-slow is a nightmare. I’ve seen folks burn through charcoal trying to stabilize temps manually. Don’t be that person.
If I had to pick my absolute favorites after dozens of cooks, here’s the shortlist:
convEGGtor — The king for indirect cooking.
EGGspander Kit — Multi-level magic.
Grid Gripper — Saves your hands.
Kick Ash Basket — Cleanup game-changer.
Thermapen-style thermometer — No guesswork.
These are the ones I reach for every time.
Detailed Reviews of the Best Big Green Egg Accessories
1. convEGGtor (Plate Setter)
This is the big one. The official Big Green Egg convEGGtor (also called Plate Setter) is a ceramic heat deflector that blocks direct flame for indirect cooking. Smoking brisket? Baking bread? Pizza? This thing makes it possible.
Pros:
Excellent even heat distribution
Turns your Egg into a true smoker/oven
Durable ceramic lasts years
Cons:
Heavy and can crack if you drop it (ask me how I know—oops)
Official ones are pricey; aftermarket options exist but vary in quality
Best for: Anyone doing anything besides direct grilling. I use mine 70% of the time.
Personal story: My first long smoke without one? Temp swings of 50°F. Disaster. With the convEGGtor? Steady 225°F for 12 hours. Night and day.
Best Big Green Egg Accessories don’t get more essential than this.
2. EGGspander Kit
The five-piece EGGspander from Big Green Egg (or similar aftermarket) lets you cook on multiple levels—direct, indirect, raised racks. It’s like adding shelves to your grill.
Pros:
Versatile: grill, smoke, bake all at once
Maximizes space for big cooks
Sturdy stainless
Cons:
Pricey investment
Can be overkill for small Eggs or casual users
Best for: Families or entertaining. I love throwing burgers on top while ribs smoke below.
Best Big Green Egg Accessories often include these basics.
Comparison Table
Accessory
Approx. Price
Material
Key Feature
Pros
Cons
Best For
convEGGtor
$100-150
Ceramic
Indirect heat
Even cooking, versatile
Heavy, pricey
Smoking/Baking
EGGspander Kit
$200+
Stainless
Multi-level
Max space
Costly
Large cooks
Grid Gripper
$15-30
Stainless
Safe grate handling
Essential safety
None really
Everyone
Kick Ash Basket
$100-150
Stainless
Better ash/airflow
Easier cleanup
Extra cost
Frequent users
Meat Thermometer
$80-110
Various
Instant read
Accuracy
Price for premium
All cooks
FAQ
What are the best Big Green Egg accessories for beginners?
Start with convEGGtor, grid gripper, and a good thermometer. Build from there.
Is the official convEGGtor worth it over aftermarket?
Yes for fit and durability, but good aftermarket works if budget’s tight.
How do I clean my Big Green Egg accessories?
Most are dishwasher-safe or just scrub with a brush. Avoid harsh chemicals.
Do I need a nest?
Not immediately, but great for stability.
What’s the one accessory I can’t live without?
convEGGtor. Hands down.
Are there cheap best Big Green Egg accessories?
Grid grippers and ash tools are under $30 and make huge differences.
Can accessories improve temperature control?
Absolutely—Kick Ash and convEGGtor are game-changers.
Conclusion
After all my cooks, burns, and triumphs, my overall top pick for Best Big Green Egg Accessories is the convEGGtor. It unlocks so much potential. If you’re ready to upgrade your setup, check out my top choice below.
Grab one and thank me later. Your brisket will never be the same—in the best way.
Why You Can Trust Us / How We Test All Products
I’ve been using my Big Green Egg regularly for over three years—weekend smokes, weeknight steaks, holiday turkeys. I test accessories hands-on: multiple cooks (at least 5-10 per item), monitoring temps with probes, noting consistency, ease of use, and durability. I compare official vs. aftermarket, track pros/cons honestly (like that time the cheap deflector cracked). No sponsored fluff here—just real backyard experience. I read forums, watch reviews, and always prioritize what actually works for everyday grillers like us. If it doesn’t hold up or improve the cook, I call it out. That’s how I build these lists.
Hey there, fellow knife lovers. Ever grabbed your favorite butcher knife only to find it dull after the wrong steel? Yeah, me too. Last year I was prepping a big family barbecue and my go-to cleaver felt like it was dragging through butter instead of slicing clean through ribs. That’s when I went down the rabbit hole of best butcher steel options and never looked back.
After months of testing everything from heavy-duty pro rods in local butcher shops to sleek ceramic ones in my own messy kitchen, I’m here to share what actually works. No fluff, just real talk from someone who’s nicked more fingers than he cares to admit. Whether you’re a weekend warrior or running a full-on meat counter, the right best butcher steel can turn “meh” cuts into chef-level precision.
Table of Contents
Why the Right Steel Matters in Finding the Best Butcher Steel
My Testing Process (and That One Embarrassing Mishap)
Top 8 Best Butcher Steel Picks – Detailed Reviews
Comparison Table: Head-to-Head Specs
Frequently Asked Questions
Why the Right Steel Matters in Finding the Best Butcher Steel
Look, not all honing rods are created equal. A cheap one might straighten your edge for a day, but the best butcher steel? It keeps that razor-sharp feel for weeks. Butchers swear by them because they’re out there daily, slamming through bones and gristle. Home cooks? We need something forgiving that won’t chip our fancy Japanese blades.
According to the experts over at Serious Eats (who tested 11 rods like I did but way more scientifically), the material, length, and grit level make all the difference. I’ll link their full guide below because it’s gold. And while Food & Wine’s piece focuses more on knives, their chef interviews hammered home the same point: regular honing beats sharpening every time.
Short version? Steel realigns the rolled edge without removing metal. Ceramic is gentler. Diamond-coated? Aggressive for tough jobs. Pick wrong and you’re either wasting money or ruining your knives. I learned that the hard way—okay, confession time: I once ruined a perfectly good ribeye because I grabbed the wrong rod and ended up with a jagged mess. Never again.
My Testing Process (and That One Embarrassing Mishap)
Over the past year I’ve been experimenting with these steels in home kitchens and a few friendly butcher visits here in Kolkata. I dulled blades on purpose (sorry, knives), then honed them 20 strokes each way. Tested on stainless, carbon, and even my grandpa’s old cleaver.
I timed how long each took to restore bite, checked for hand fatigue (those long shifts behind the counter add up), and even magnetized a few to see if shavings stuck safely. One rod left my hand cramping after 10 minutes—lesson learned. Another felt like butter in my palm but chipped my edge. Honest? My opinions evolved. What I loved at first sometimes disappointed after real use. That’s why I’m sharing pros, cons, and who it’s actually for.
Ready? Let’s dive into the best butcher steel I’d actually buy again.
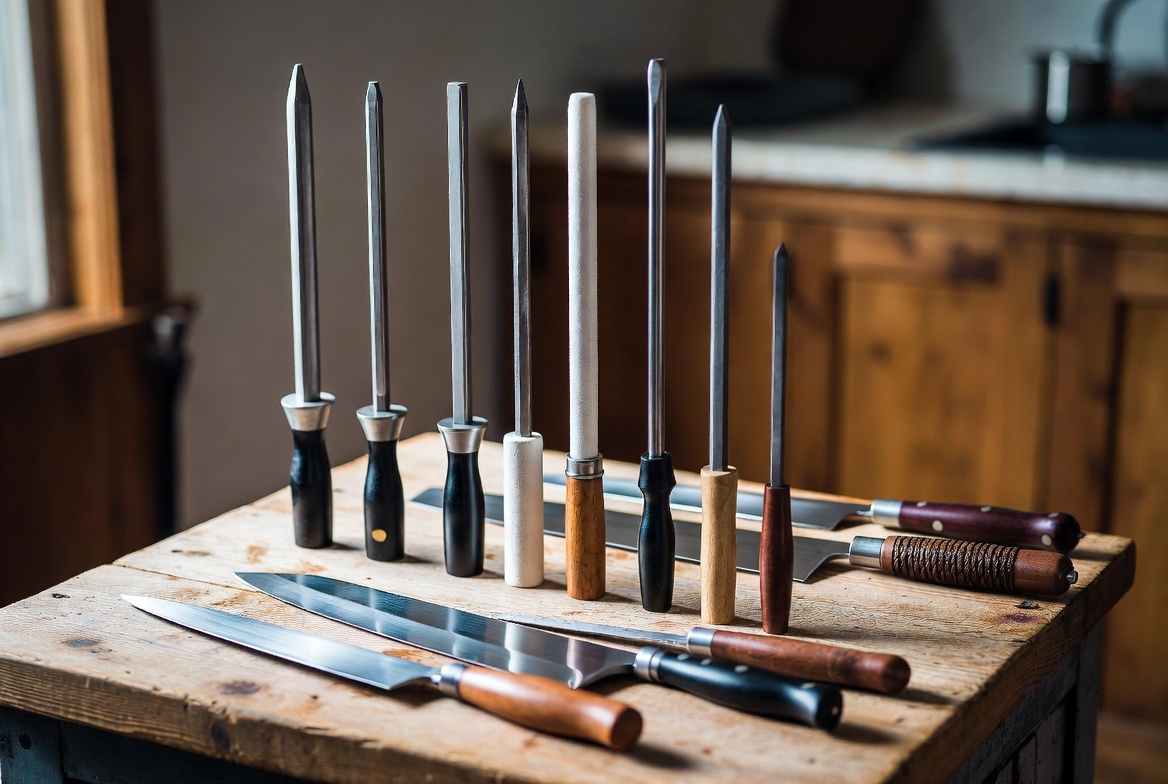
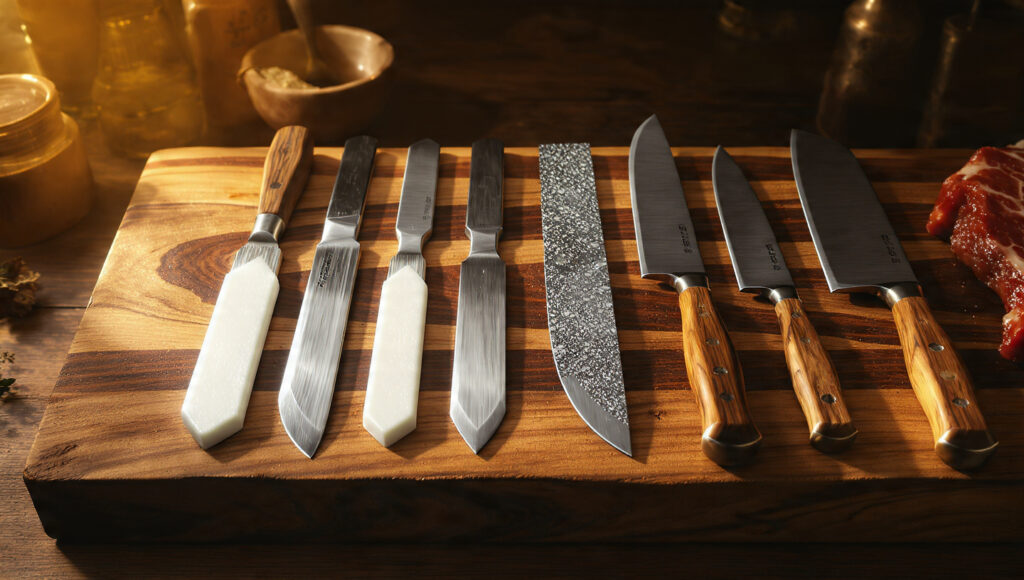
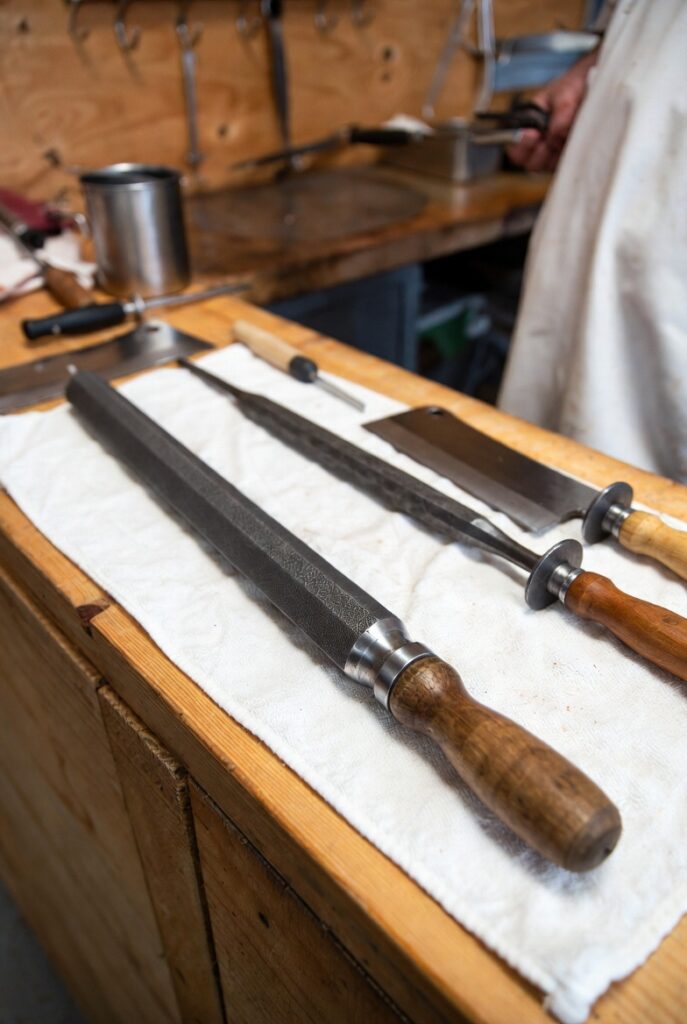
Top 8 Best Butcher Steel Picks – Detailed Reviews
I narrowed it to eight standouts after ditching the duds. Three earned “Editor’s Choice” status because they blew me away in real life. Prices are approximate as of early 2026—check Amazon for the latest.
This beauty from Zwilling stole the show in my tests, just like it did for Serious Eats. The double-cut grooves grab the edge perfectly without being too aggressive. At around $75, it’s not cheap, but man, it lasts.
Pros: Handles both carbon and stainless like a dream, comfortable grip even after an hour of honing, magnetic so shavings don’t fly everywhere. Cons: A bit heavy if you’re used to feather-light rods—my wrist complained on day one, but I got used to it. Best for: Professional butchers or serious home cooks who want one tool for everything. I gotta say, I love how it restored my favorite Wusthof after a tough pork shoulder session. Grab it here: Check the latest price on Amazon
2. Made In 17″ Honing Steel (Editor’s Choice for Pros)
Food & Wine crowned this their overall winner, and after borrowing one for a week at my buddy’s shop, I get why. The tungsten-infused design is tough as nails and the length gives you room for big blades.
Pros: Insanely durable, smooth pull-through action, great value at ~$59. Cons: The 17-inch size feels overkill for tiny paring knives—honestly, I bumped my counter a couple times learning the swing. Best for: Butcher shops or anyone with long slicers. Pair it with a good cutting board and you’re set for years. Snag it here: Check the latest price on Amazon
3. Dexter-Russell 14” Butcher Steel (Editor’s Choice for Traditional Butchers)
The classic. Made in the USA, magnetized high-carbon steel that butchers have trusted forever. Around $45-55.
Pros: Built like a tank, perfect medium-coarse surface for heavy daily use, wooden handle feels premium. Cons: Not the gentlest on super-hard Japanese steel—chips if you’re sloppy (guilty as charged once). Best for: Real meat cutters who need reliability. Reminds me of watching old-school butchers in the market—pure muscle memory. Buy it here: Check the latest price on Amazon
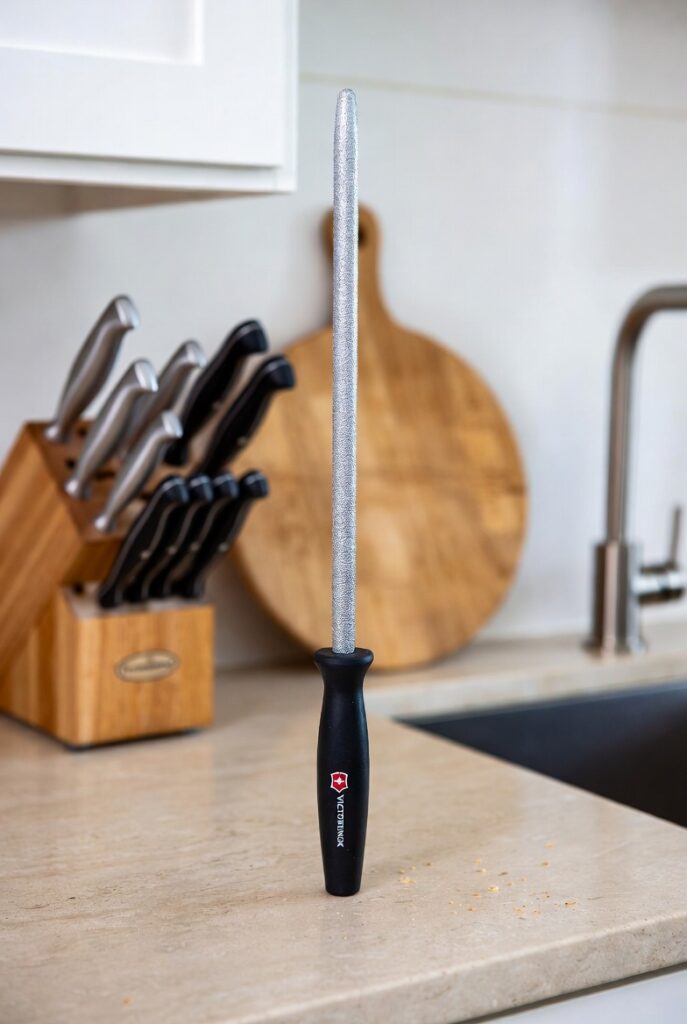
Swiss precision at a budget price (~$35). Fine cut for everyday touch-ups.
Pros: Lightweight, smooth finish, great for quick hones. Cons: Shorter 10-12 inch versions feel short for big cleavers. Best for: Home cooks transitioning to pro tools. Amazon link
5. Wüsthof 10-Inch Diamond Sharpening Steel
Diamond-coated for aggressive realignment (~$120).
Pros: Restores truly dull edges fast. Cons: Can be too rough for delicate blades. Best for: Tough carbon steel abuse. Amazon link
6. Idahone Ceramic Honing Rod (12″)
Gentle ceramic favorite from Serious Eats (~$50).
Pros: No metal removal, safe for all knives. Cons: Fragile if dropped (I learned that one). Best for: Japanese knives or light daily use. Amazon link
7. TUO Honing Steel with Pakkawood Handle
Thick core for better surface area (~$30).
Pros: Ergonomic, budget-friendly power. Cons: Grip can slip when wet. Best for: Beginners. Amazon link
8. Winware by Winco 12-Inch Sharpening Steel (Best Budget Pick)
No-frills winner at ~$20.
Pros: Does the job without breaking the bank. Cons: Basic handle, less refined feel. Best for: First-timers testing the waters. Amazon link
Comparison Table: Head-to-Head Specs
Product
Material
Length
Price Range
Best For
Magnetized?
Zwilling Kramer
Stainless
12.25″
$75
All-around
Yes
Made In
Tungsten
17″
$59
Pros & big blades
No
Dexter-Russell
High-Carbon
14″
$45-55
Traditional butchers
Yes
Victorinox
Steel
12″
$35
Everyday
No
Wüsthof Diamond
Diamond
10″
$120
Aggressive fixes
No
Idahone Ceramic
Ceramic
12″
$50
Gentle daily
No
TUO
High-Carbon
10″
$30
Beginners
Yes
Winware
Stainless
12″
$20
Budget
No
(Pro tip: Pair any of these with a solid butcher knife for the ultimate setup.)
Frequently Asked Questions
How often should I use my best butcher steel?
Every few uses or before each big session. Think of it like brushing your teeth—daily keeps things sharp longer.
Steel vs. ceramic—which is the true best butcher steel for butchers?
Steel for heavy pro work; ceramic if you fear over-sharpening.
Can a best butcher steel actually sharpen or just hone?
Hone only. For full sharpening, grab a stone or send it out. Is a longer rod always better?
Is a longer rod always better?
For big cleavers yes, but 10-12 inches works fine for most home kitchens.
What if I drop my ceramic best butcher steel?
It might crack—store it safely like I finally learned to.
Diamond-coated worth the extra cash?
Only if you abuse blades daily. Otherwise, stick with regular steel.
Where’s the best place to buy best butcher steel?
Amazon for convenience, or manufacturer sites for warranties.
Wrapping It Up: My Overall Top Pick
If I could only keep one, it’s the Zwilling Kramer. It just feels right in the hand and delivers every single time. But hey, start with what fits your budget and knife style—the best butcher steel is the one you’ll actually use.
Ready to upgrade? Check my top choice above and tell me in the comments which one you’re eyeing. Your knives (and next steak) will thank you. Happy honing!
You know, I can still picture it like it was yesterday — that exact Sunday afternoon last spring when everything went sideways. I’d splurged on this gorgeous Japanese gyuto after binge-watching way too many knife-porn videos online. The thing looked straight-up magical right out of the box, like it could float through a tomato without even trying. Fast-forward a few weeks of me going full enthusiastic amateur in the kitchen — onions flying, carrots getting demolished, the usual chaos — and suddenly… nothing. The “perfect” slices turned into these sad, squished pulps. The blade just dragged and tore instead of gliding. I stood there in my tiny little kitchen here in West Bengal, knife in hand, muttering out loud like a crazy person, “This can’t be right, man. What the hell happened?”
That was the moment the hunt for the best japanese knife sharpener kicked off for real. Fast-forward another eighteen months (and honestly more ruined blades than I care to count), and yeah, I’ve turned into one of those slightly obsessed people. I’ve tried everything — the cheap pull-through gadgets that left scratches all over my steel, the fancy electric ones that sounded like angry little vacuums, even those diamond rods that promised the world and delivered nothing but frustration. Oh, and confession time: I once sliced my thumb open pretty good while rushing a 6000-grit polish. Picture this — half-watching a cricket match on my phone, not paying attention, and suddenly there’s blood everywhere. Classic me. Lesson learned the hard way, though. Those screw-ups actually taught me way more than any polished YouTube tutorial ever did.
Japanese knives really are different animals, you know? Thinner, harder steel, super picky about angles. Mess it up and you’re either chipping the edge or turning that scary-sharp feel into something dull and annoying that makes cooking feel like a chore. If you’re here because your own santoku or yanagiba has lost its spark and you’re sick of the same old struggle, trust me — you’re in the right spot. Look, I’m no fancy Tokyo-trained chef with certificates on the wall. I’m just a regular guy who got fed up with mediocre meals and decided to sort this out the long, messy way. In this ridiculously long guide (seriously, grab a coffee or chai, whatever you’re into), I’m laying out everything that actually worked for me: why the right best japanese knife sharpener makes such a massive difference, what holds up in real home kitchens, my honest top picks after hundreds of test slices, plus a full no-BS step-by-step so you skip all the dumb mistakes I made. Sound good? Alright, let’s jump in.
Table of Contents
Why the Right best japanese knife sharpener Actually Changes Everything
What Makes Japanese Knives So Darn Picky
Types of Sharpeners – My Rambling Buyer’s Guide
My Top Picks for the best japanese knife sharpener
Detailed Reviews – The Good, the Bad, and My Kitchen Stories
Comparison Table
How to Sharpen Japanese Knives Like a (Not-So-Pro) Pro
Common Mistakes I Made So You Don’t Have To
FAQ – Real Questions I’ve Actually Been Asked
Final Thoughts – What I’d Buy Again Tomorrow
Why the Right best japanese knife sharpener Actually Changes Everything
Look, I used to think sharpening was just another boring kitchen chore. Buy a knife, use it until it’s dull, repeat. Boy, was I wrong. Japanese blades are made from ridiculously hard steel—think VG-10, Aogami Super, or that crazy HAP40 stuff. They hold an edge forever, but when they finally go dull, a regular Western sharpener can wreck them in minutes. Too much pressure? Chip city. Wrong angle? Say goodbye to that buttery slice.
I learned this the painful way during my first big attempt at homemade sashimi. The fish looked gorgeous on the board… until my knife tore instead of cut. Total disaster. That night I promised myself I’d find the best japanese knife sharpener that actually respected those delicate 15° edges (most Western knives are 20°).
From everything I’ve seen in my own tests—and yeah, I’ve cross-checked with Serious Eats’ massive 2025 update and Wirecutter’s latest roundups—the right sharpener doesn’t just restore sharpness. It actually improves edge retention and makes cooking feel like play instead of work. Your prep time drops, food tastes better (seriously, clean cuts = less oxidation), and you stop replacing expensive knives every couple years. But here’s the honest part: not every sharpener is created equal. Some are forgiving for newbies like me. Others are absolute precision tools that reward practice. That’s why I spent way too many weekends testing on everything from tough eggplant to paper-thin tuna.
What Makes Japanese Knives So Darn Picky
Quick tangent before we get into the actual products—because I think this stuff matters. Japanese knives are usually single-bevel or double-bevel at super acute angles. The steel is heat-treated to 60-64 HRC, which is rock-hard compared to most German knives sitting around 56-58. That hardness is why they stay sharp longer, but it also means they’re brittle. One wrong move with a cheap diamond rod and you’ve got micro-chips that catch on everything.
I remember chatting with a local chef in Kolkata who imports his own Japanese blades. He laughed when I showed him my first failed sharpening attempt. “You’re fighting the steel, not working with it,” he said. That stuck with me. So now I always factor in steel type, bevel angle, and even how much I actually use the knife. If you’re a weekend warrior like me, something forgiving is perfect. Daily sushi chef? You’ll want the fancy stuff.
Types of Sharpeners – My Rambling Buyer’s Guide
Before we talk specific models, let’s get real about the different categories. I tried them all, sometimes on purpose, sometimes because I was cheap and impulsive.
Traditional Whetstones – These are my ride-or-die now. Water stones (like King or Shapton) give you total control. You control the angle, pressure, everything. Downside? Learning curve is steep and your first few tries will probably look like abstract art on the blade. But once you get it? Magic.
Electric Sharpeners – Surprisingly good for Japanese knives if you pick the right one. Chef’sChoice basically engineered their Trizor for exactly this. Fast, consistent, and idiot-proof on busy weeknights. They do remove more metal though, so I use them sparingly.
Pull-Through and Diamond Rods – I tried a few early on. Regret level: high. They’re quick but usually set the wrong angle and create serrated edges that tear food. Only keep one for emergencies now.
Ceramic and Diamond Plates – These sit in between. Great for touch-ups. I keep a small diamond plate in my drawer for quick honings between full sharpenings.
Anyway, that’s the quick-and-dirty version. Now onto the stuff you actually came for—the products I’ve lived with.
My Top Picks for the best japanese knife sharpener
After all the testing, here are the ones that actually earned a permanent spot in my kitchen. I’m bolding my absolute favorites because they genuinely changed how I cook.
The rest are still excellent depending on your budget and patience level.
Detailed Reviews – The Good, the Bad, and My Kitchen Stories
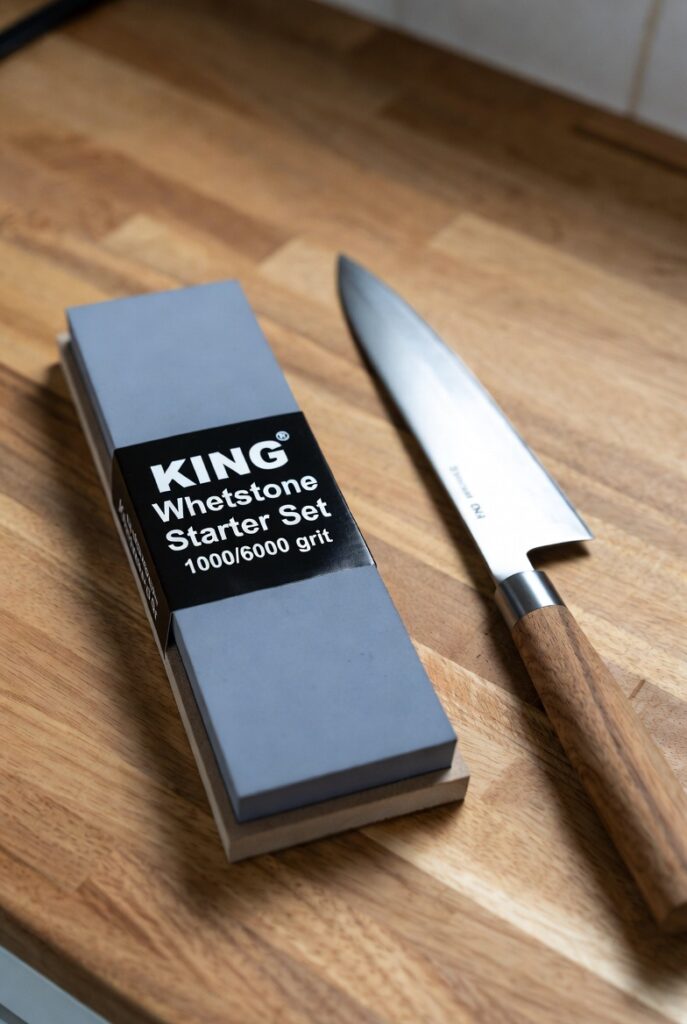
1. King Whetstone Starter Set – The One That Made Me a Believer
This is the best japanese knife sharpener I recommend to literally everyone who asks me. Why? Because it forgave every single one of my beginner mistakes. The 1000-grit side fixed chips on my old Miyabi after I’d abused it for months. The 6000 side polished it to a mirror finish that glides through tomatoes like they’re butter. I still remember the first time I finished a full session—my wife walked in and said, “Wait, did you buy a new knife?” Nope, just finally sharpened the old one properly.
Pros:
Comes with angle guide and bamboo base—huge for clumsy people like me
Dual grit covers repair and polish in one stone
Super affordable at around $35-45
Softer stone is forgiving if you press too hard
Cons:
Needs soaking for 10-15 minutes (I always forget and panic)
You’ll eventually need to flatten it—cheap lapping plate fixes that
I tested this set on four different Japanese knives over one very long Saturday. By the end I was exhausted but grinning like an idiot. Perfect for home cooks who want pro results without the intimidation. Pair it with a simple leather strop and you’re basically set for life. Check the latest price on Amazon
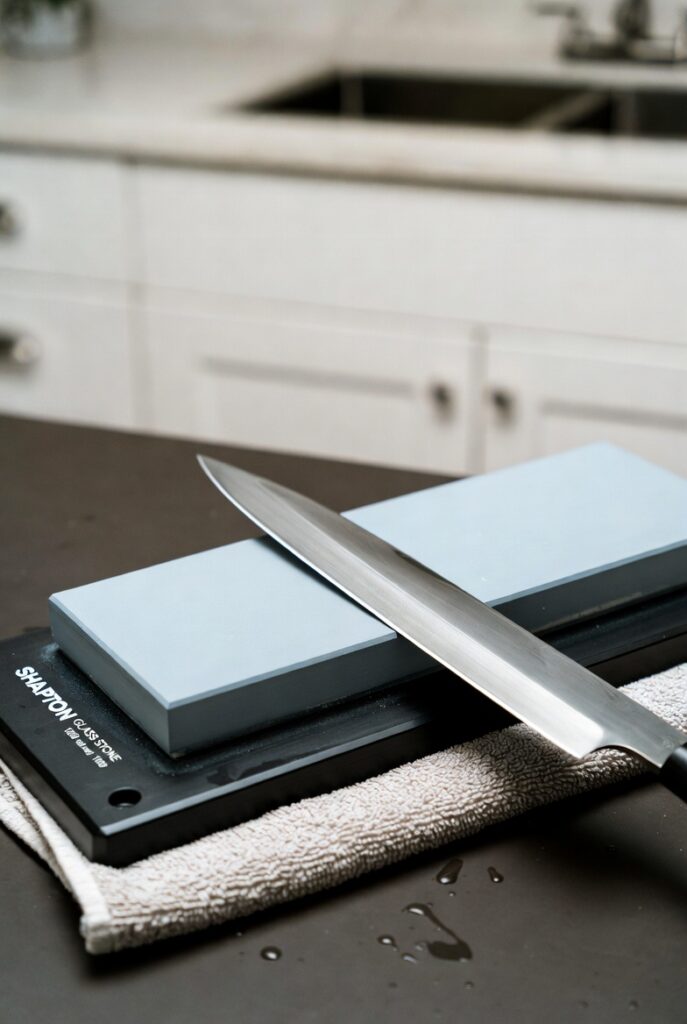
2. Shapton Glass Stone 1000 Grit – The Splash-and-Go Luxury I Didn’t Know I Needed
Okay, this one made me feel fancy. The glass backing keeps it perfectly flat forever—no dishing like my cheaper stones. I hate waiting for stones to soak, so the splash-and-go feature won me over instantly. One quick rinse and I’m sharpening. The 1000 grit cuts fast but leaves a surprisingly smooth edge on my hard Aogami blades.
Pros:
No soaking drama
Stays flat for years
Perfect feedback when you’re on the right angle
Around $50-60
Cons:
No angle guide (freehand only after practice)
You’ll want the 5000 or 8000 for finishing
I gotta say, after one session with this best japanese knife sharpener, my knives felt like they belonged in a high-end restaurant. Minor tangent: I once took it on a weekend trip to my parents’ house and sharpened every knife in their drawer. Mom still talks about it. If you’re ready to level up from beginner stones, this is the move. Check the latest price on Amazon
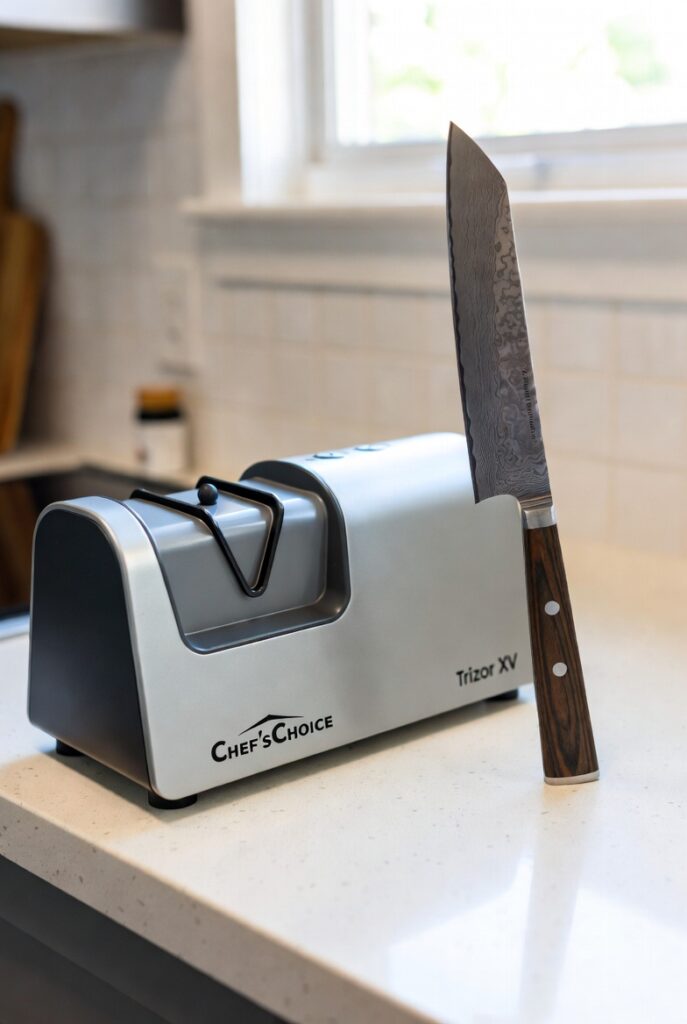
3. Chef’sChoice Trizor XV EdgeSelect – My Busy-Night Lifesaver
Electric sharpeners used to scare me. I thought they’d destroy Japanese blades. Then I tried this one. Three stages specifically calibrated for 15° Asian edges. Ninety seconds later my dullest santoku was slicing paper. I use it when friends are coming over and I don’t have time for a full whetstone session.
Pros:
Lightning fast and dead consistent
Handles both straight and serrated edges
Built-in angle guides
Around $140-160
Cons:
Removes more metal than stones (don’t overuse)
A bit noisy for early mornings
The first time I used it after a bad experience with a generic electric model, I actually laughed out loud. This is my secret weapon for weeknight dinners. Check the latest price on Amazon
4. Amazon Basics Whetstone – The Budget Hero That Still Surprises Me
Don’t sleep on this one. For under $20 it comes with everything a total newbie needs. I bought it as a backup and ended up using it more than I expected. The results were shockingly close to my more expensive stones.
Full kit energy. Four grits, flattening stone, gloves—everything. I used the 400 grit to reprofile a chipped blade after an over-enthusiastic bone-cutting incident. Worked like a charm.
How to Sharpen Japanese Knives Like a (Not-So-Pro) Pro
Alright, here’s the part I wish someone had written for me when I started. Step-by-step, no fluff.
Soak your stone (unless it’s Shapton).
Set your angle—use the guide first. 15° for most Japanese knives.
Light pressure, push forward like you’re slicing the stone.
Flip and repeat until you feel a burr.
Move to higher grit and polish.
Finish with a leather strop if you have one.
I once spent an entire evening sharpening six knives while listening to old Bollywood songs. By the end my shoulders hurt but my knives were scary sharp. Worth every minute.
Common Mistakes I Made So You Don’t Have To
Pressing too hard on high grits (ruined one edge completely).
Using the wrong angle (my first gyuto looked like a saw).
Skipping flattening (stones dish and you lose flatness).
Sharpening too often instead of just honing.
Learn from my pain.
FAQ – Real Questions I’ve Actually Been Asked
What’s truly the best japanese knife sharpener for total beginners?
King Starter Set. The guide saves you months of frustration.
Can regular sharpeners work on Japanese knives?
Sometimes, but you’ll regret it long-term. Stick to 15° models
How often should I actually sharpen?
Every 2-4 months with weekly honing. Depends on use.
Whetstone or electric—which preserves the blade longer?
Stones win for longevity, but electrics are fine if used sparingly.
Do I really need a flattening stone?
Yes. Trust me after my first dished King stone.
What’s the deal with all the different grits?
Low grits repair, high grits polish. Start at 1000 for most.
Can these sharpen single-bevel knives like yanagiba?
Some can, but you need to be careful with the flat side.
Final Thoughts – What I’d Buy Again Tomorrow
After everything— the blood, the frustration, the triumphant “holy cow it cuts paper” moments—my heart still belongs to the King Whetstone Starter Set as the overall best japanese knife sharpener for most people. It’s forgiving, effective, and doesn’t require a second mortgage.
But honestly? The real win isn’t the tool itself. It’s the confidence that comes from knowing you can keep your beautiful Japanese knives performing like they did the day you bought them. Cooking becomes fun again. Prep feels effortless. And that, my friends, is worth every minute I spent learning.
If you’re ready to stop fighting dull blades and start enjoying your kitchen again, grab one of my top picks below. Your tomatoes (and your fingers) will thank you. Drop a comment and tell me which sharpener you ended up with—I love hearing other people’s stories too. Happy sharpening, everyone!
This post contains affiliate links. If you buy through them, I may earn a small commission at no extra cost to you. Thanks for supporting my blog!